

- 追踪单个LLM调用和完整的应用管道。
- 收集和查询用户反馈。
- 记录元数据并将其用于过滤和A/B测试。
- 使用监控仪表板跟踪生产性能。
前提条件
开始之前,请确保你已具备:- 一个LangSmith账户:在 smith.langchain.com 注册或登录。
- 一个LangSmith API密钥:按照 创建API密钥 指南操作。
- 一个OpenAI API密钥:从 OpenAI控制面板 生成。
- LangSmith CLI(可选):安装以从终端检查追踪。有关说明,请参阅 LangSmith CLI。
原型设计
从一开始就设置好可观测性可以让你更快地迭代。你可以确切地看到发送给模型的内容、返回的内容以及时间消耗在哪里,而无需添加打印语句或运行调试器。设置你的环境
在你的shell中设置以下环境变量:LANGSMITH_PROJECT 环境变量。如果未设置该变量,LangSmith 将在跟踪数据摄取时自动创建一个默认跟踪项目。
你可能会在其他地方看到这些变量被引用为
LANGCHAIN_*。两者都有效,但 LANGSMITH_TRACING 和 LANGSMITH_API_KEY 是推荐的名称。追踪LLM调用
首先追踪你的OpenAI调用,这是模型实际被调用的地方。这让你能立即了解应用发送的提示和模型返回的响应。 使用wrap_openai(Python)或 wrapOpenAI(TypeScript)包装OpenAI客户端。创建一个名为 app.py(或 app.ts)的文件,包含以下代码:
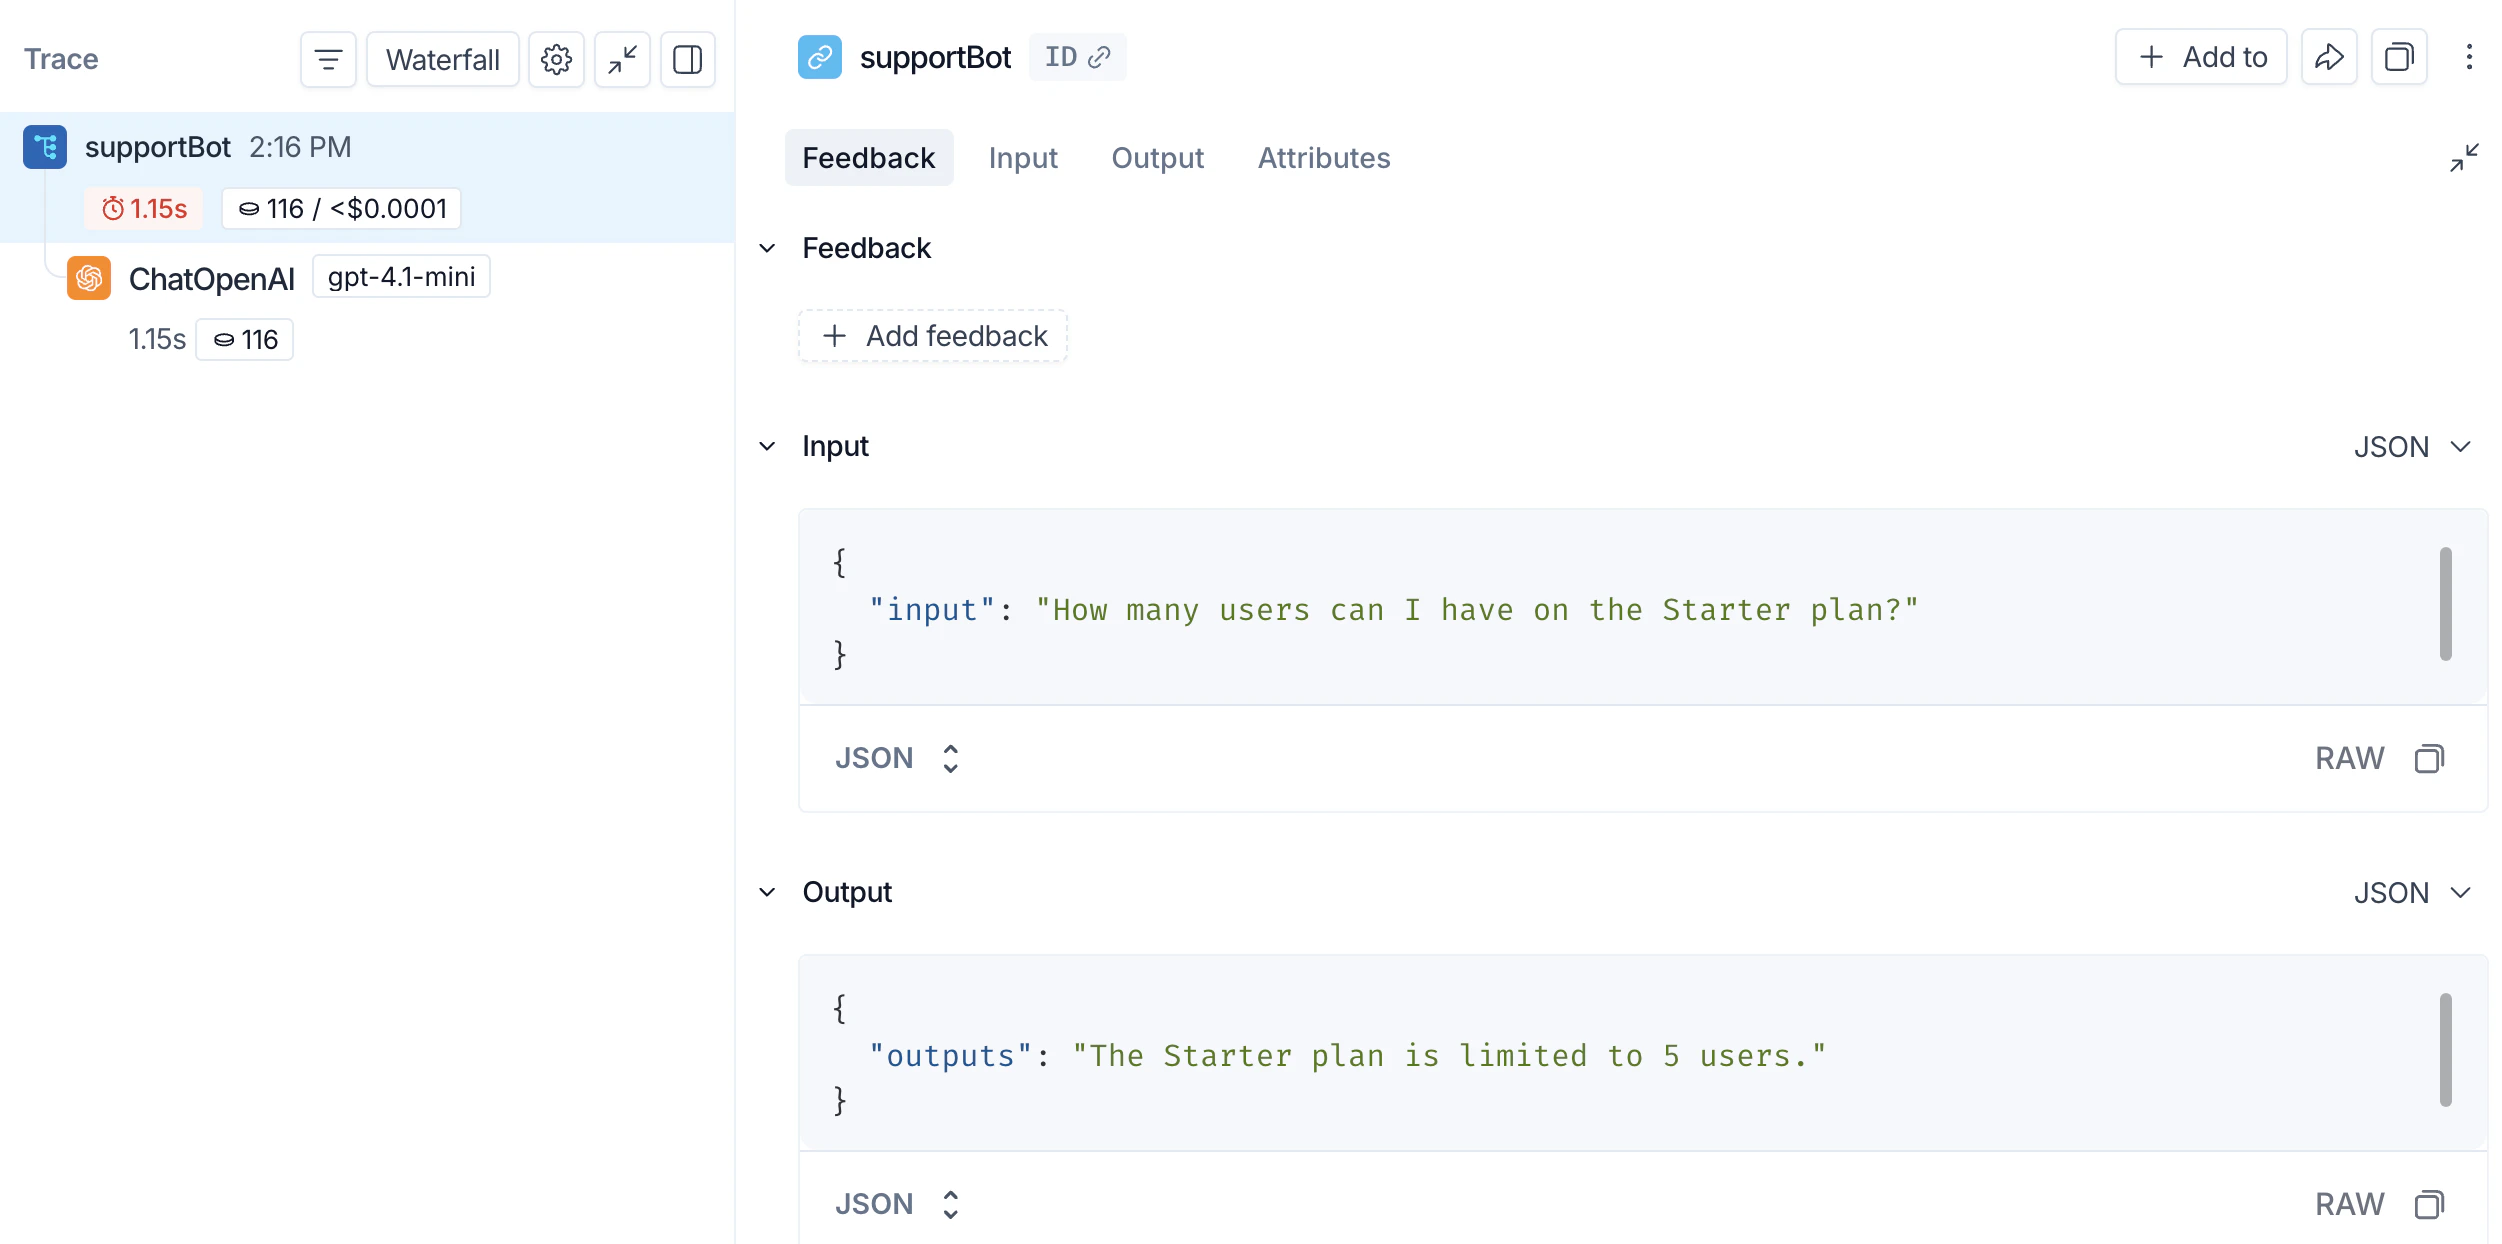
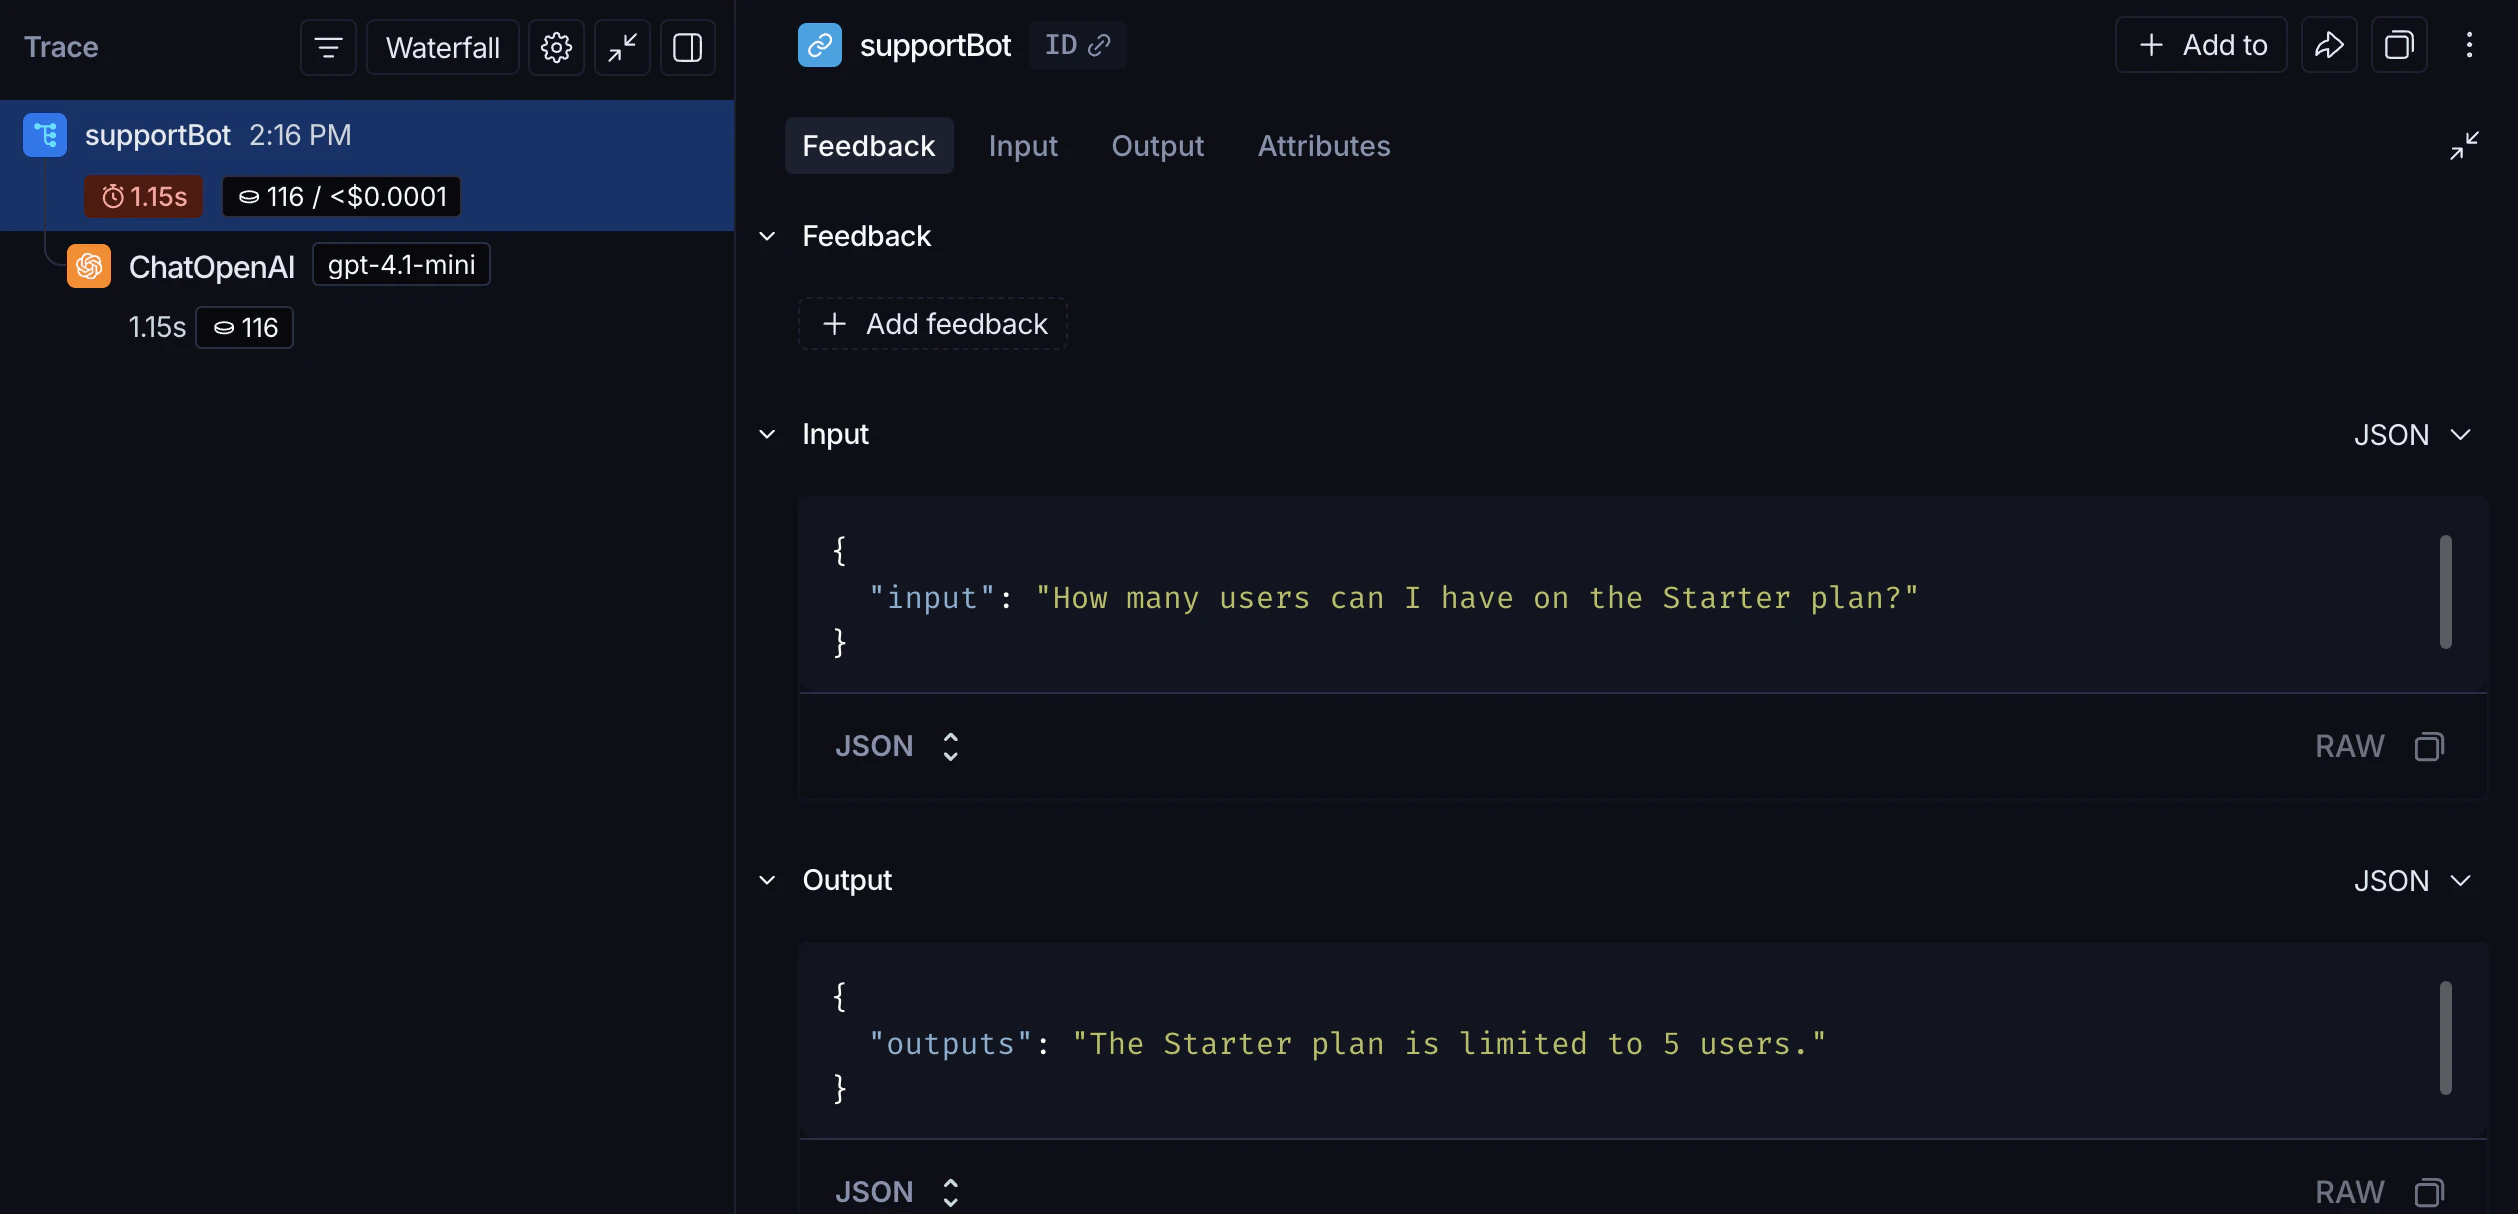
support_bot("How many users can I have on the Starter plan?") 会生成OpenAI调用的追踪。
追踪整个管道
追踪LLM调用很有用,但追踪整个管道(包括检索)可以让你全面了解应用的行为。在主函数上添加@traceable(Python)或 traceable(TypeScript):
support_bot("How many users can I have on the Starter plan?") 现在会生成完整RAG管道的追踪。
从终端检查你的追踪
如果你安装了 LangSmith CLI,可以列出项目的最近追踪而无需打开UI:测试阶段
一旦你的应用在原型设计阶段运行良好,你就会将其发布给一小部分真实用户。在这个阶段,你通常不知道用户将如何与你的应用交互,因此你需要更丰富的可观测性。你不仅想了解应用做了什么,还想了解用户对其的反应。收集反馈
将 用户反馈 链接到特定的追踪,可以让你识别哪些响应是有帮助的或无帮助的。更新上一步中的app.py(或 app.ts),为每次调用添加运行ID,并在之后附加分数:
在生产环境中,这两部分会位于不同的位置:带有
run_id 的 support_bot 调用保留在你的应用中,而 create_feedback 则移到接收用户反馈的端点(例如,/feedback API路由)。run_id 从一个传递到另一个,以便反馈可以链接到正确的追踪。记录元数据
元数据 允许你用对过滤和比较有用的属性标记运行。例如,使用了哪个模型版本或哪个用户发起了请求。 以下示例追踪检索器(使用run_type="retriever")和主函数(使用 metadata 属性记录模型名称):
生产环境
有了强大的可观测性,你就可以自信地发布到生产环境。在生产环境中,你有显著更多的流量,无法单独检查每个追踪。LangSmith提供监控工具来帮助你理解聚合行为,并在出现问题时深入探究。监控
在UI侧边栏中,选择 监控,然后从左上角的下拉菜单中选择一个追踪项目。图表显示项目随时间的关键指标,包括追踪数量、延迟、错误率、反馈分数和成本。有关可用指标和图表配置的更多信息,请参阅 仪表板。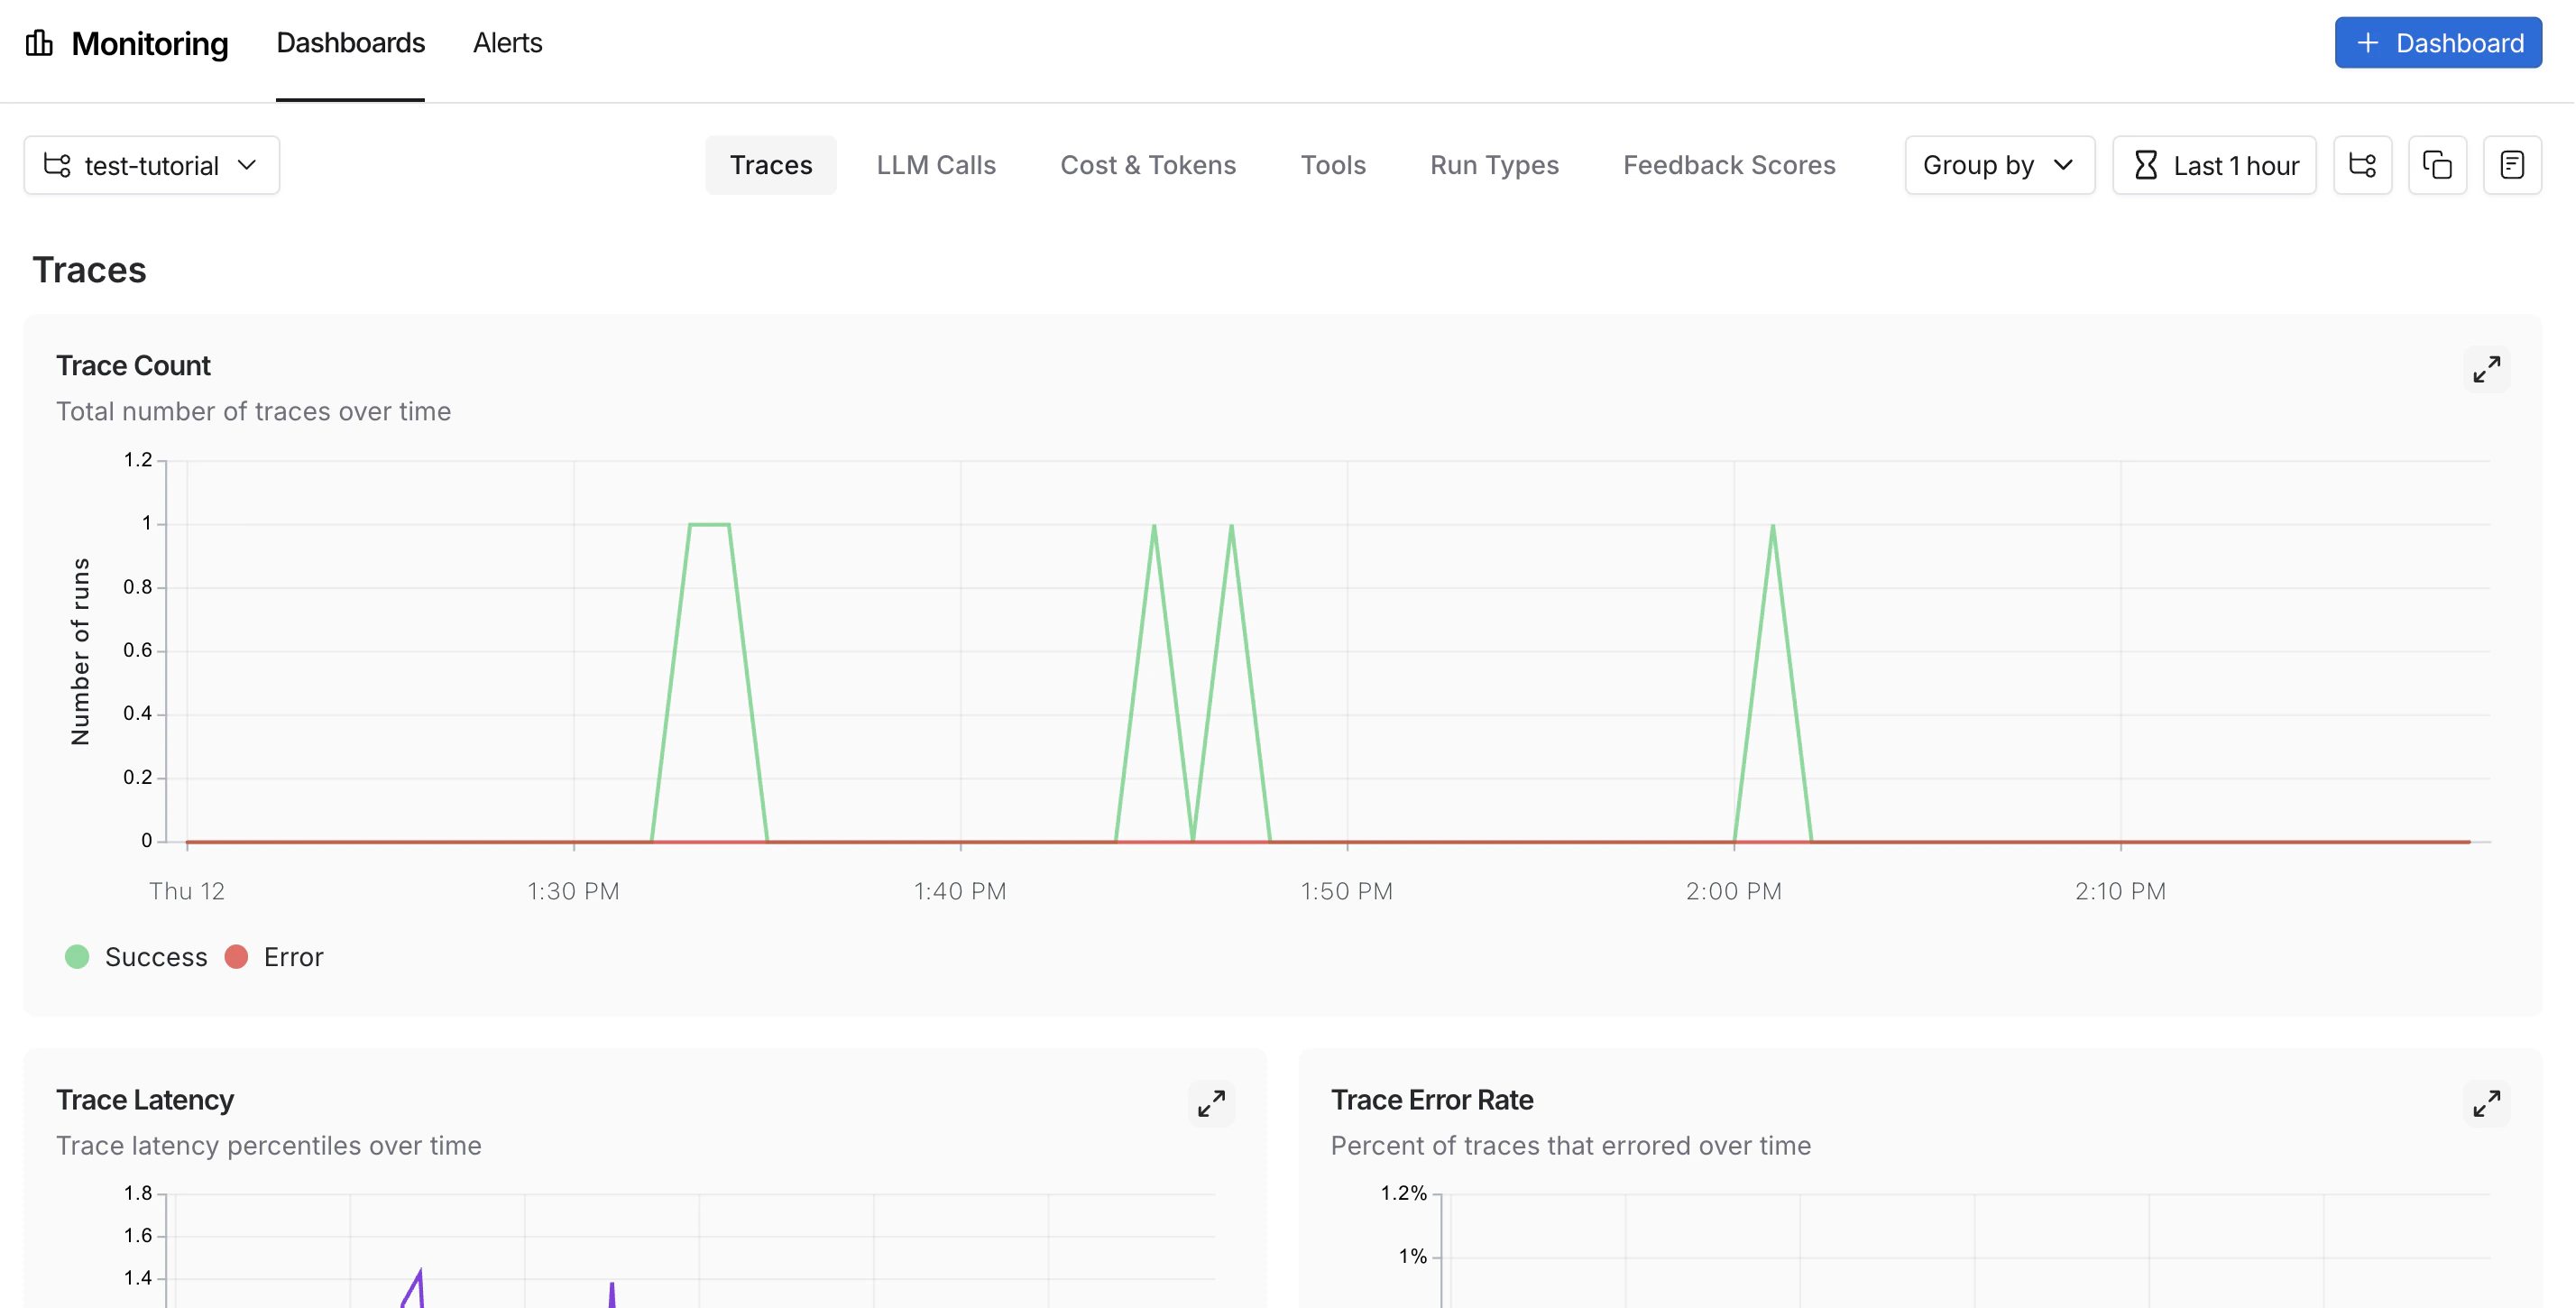

A/B测试
分组功能要求给定的元数据键至少有两个不同的值。
llm 元数据属性,所以你可以按该属性对监控图表进行分组,以比较模型随时间的性能。从UI侧边栏的 监控 中,点击左上角的 分组依据,从下拉菜单中选择 元数据,然后选择 llm。图表会更新以显示按该属性分组的结果。有关分组和自定义图表的更多信息,请参阅 仪表板。
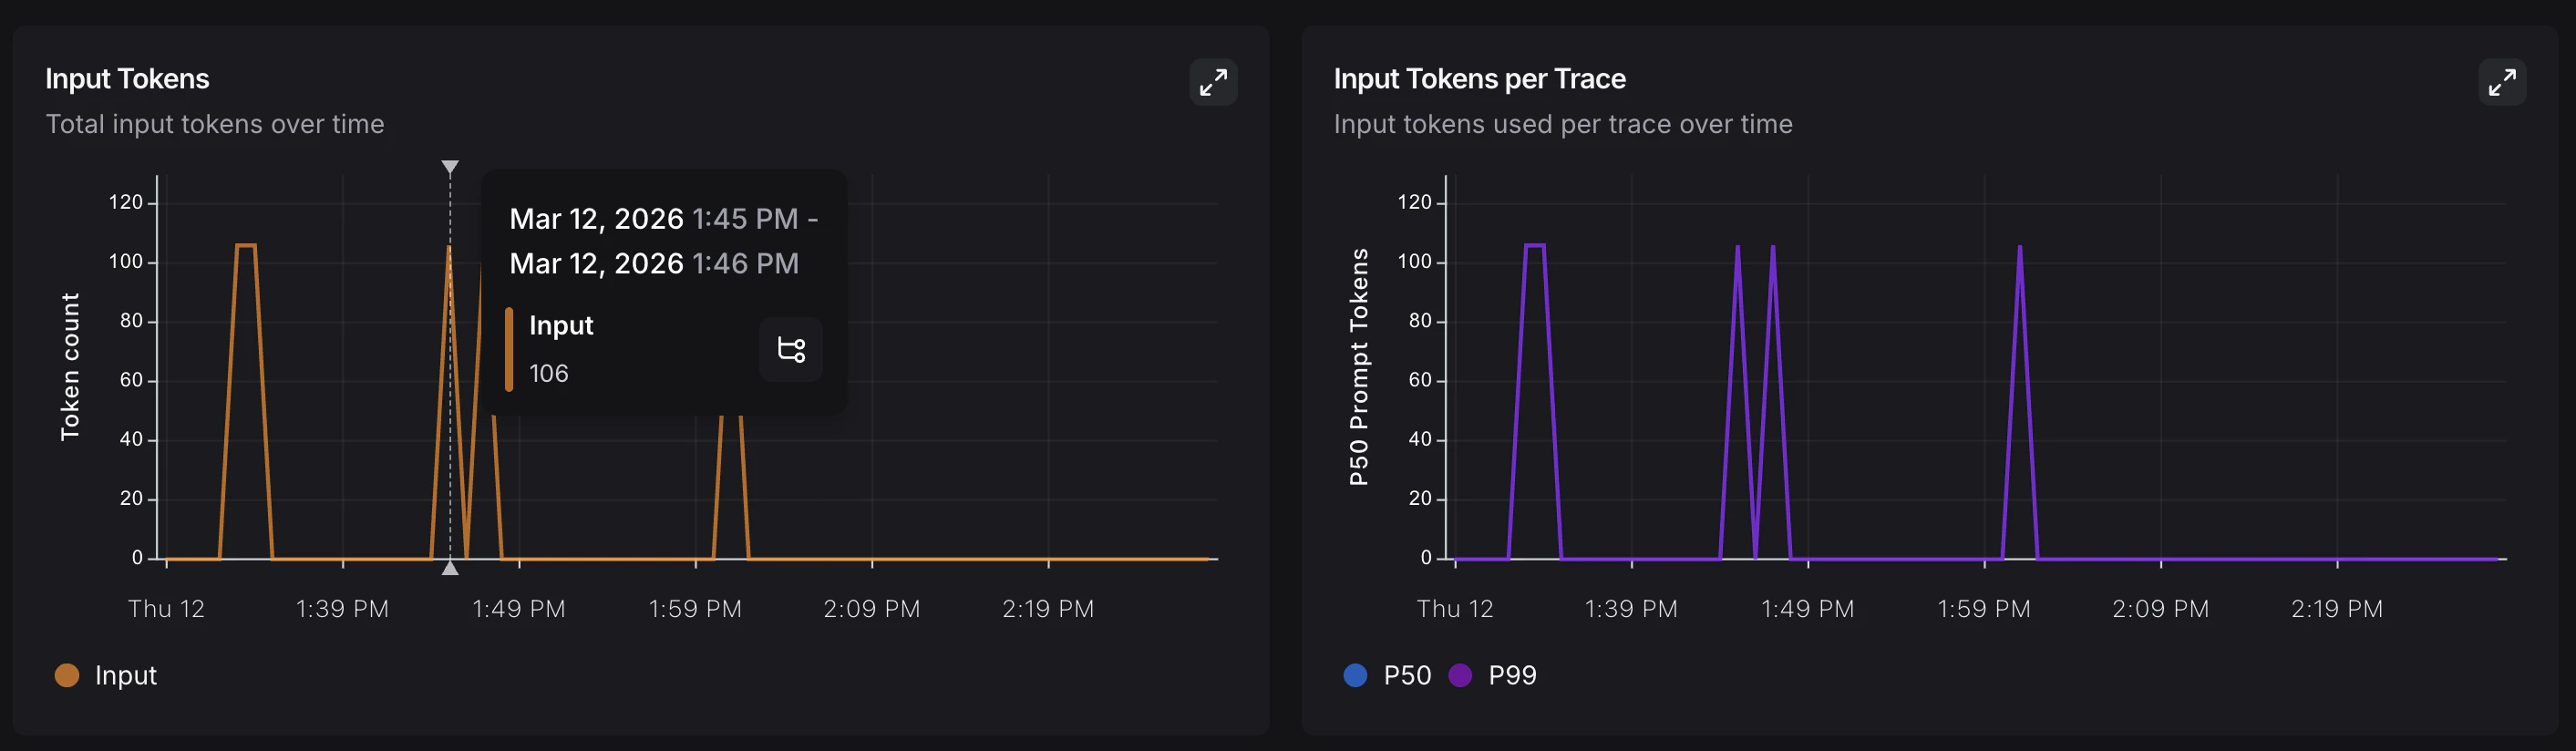
深入探究
当监控图表显示异常时,点击一个数据点以固定工具提示,然后点击指标名称(例如,输入)跳转到该时间窗口的过滤运行表。有关搜索和过滤运行的更多信息,请参阅 过滤追踪。
结论
在本教程中,你为应用在其整个开发生命周期中添加了LangSmith可观测性。在原型设计阶段帮助你快速迭代的相同追踪设置,在生产环境中将继续提供价值。你将能够查看单个追踪和聚合性能趋势。 更多信息,请参阅:将这些文档 通过MCP连接到Claude、VSCode等,以获取实时答案。