> ## Documentation Index
> Fetch the complete documentation index at: https://cndoc-langchain.site/llms.txt
> Use this file to discover all available pages before exploring further.
# 快速入门
> 从模板构建一个智能体
在本快速入门指南中,你将使用预定义的 **邮件助手** [模板](/langsmith/fleet/templates),它能为你整理和管理收件箱。
* 选择一个不同的模板。
你将通过聊天与你的智能体互动,就像给一个乐于助人的助手发短信一样。
## 开始之前
你需要:
* 一个 LangSmith 账户([在此注册](https://smith.langchain.com/agents?skipOnboarding=true))。
* 一个 Gmail 账户。
* 一个 Google 日历。
* 一个 OpenAI 或 Anthropic API 密钥(步骤 1 将向你展示如何获取)。
## 1. 获取你的模型 API 密钥
你的智能体需要一个 API 密钥来连接 AI 模型。AI 模型使你的智能体能够理解并响应你的请求。
1. 前往 [platform.openai.com/api-keys](https://platform.openai.com/api-keys)。
2. 点击 **Create new secret key**。
3. 给它一个名称,例如 "Fleet"。
4. 复制密钥(它以 `sk-` 开头)。
5. 将其保存在安全的地方,你将在步骤 2 中用到它。
1. 前往 [console.anthropic.com/settings/keys](https://console.anthropic.com/settings/keys)。
2. 点击 **Create Key**。
3. 给它一个名称,例如 "Fleet"。
4. 复制密钥(它以 `sk-ant-` 开头)。
5. 将其保存在安全的地方,你将在步骤 2 中用到它。
两项服务均按使用量收费。
## 2. 将你的 API 密钥添加到 LangSmith
现在你将把你的 API 密钥添加到 LangSmith,以便你的智能体可以使用它:
1. 前往 [smith.langchain.com](https://smith.langchain.com)。
2. 点击左下角的 **设置** 图标。
点击顶部的 **Secrets** 标签页。
1. 点击 **Add secret**。
2. 对于 **Key**,输入:
* `OPENAI_API_KEY`(如果使用 OpenAI)
* `ANTHROPIC_API_KEY`(如果使用 Anthropic)
3. 对于 **Value**,粘贴你在步骤 1 中复制的 API 密钥。
4. 点击 **Save secret**。
你的智能体现在可以访问 AI 模型来理解并响应你的请求了。接下来,你将创建你的智能体。
## 3. 创建你的智能体
1. 在 [LangSmith UI](https://smith.langchain.com) 中,点击左侧导航栏顶部的 **Switch to Fleet**。
1. 在左侧导航栏中选择 **Templates**。
2. 选择 **Email Assistant** 模板。
3. 点击 **Use this template**。
如果你不想从模板开始,你还有另外两个选择。在 **+ New Agent** 页面:
* **Chat**:使用聊天界面描述你的智能体,它将逐步帮助你创建。
* **Manually**:选择 **Create manually instead**,在配置页面上构建你的智能体,无需任何预填充的响应。
你的智能体会要求你连接你的 Google 账户:
1. 点击 **Connect**。
2. 使用你的 Google 账户登录。
3. 查看权限并点击 **Allow**。
4. 你将被重定向回 LangSmith,你的智能体将在此创建。
你的智能体仅在处理你交给它的任务时访问你的账户。你可以随时在你的 Google 账户设置中撤销访问权限。
## 4. 查看智能体模板
此时,你可以查看邮件助手的模板说明。如果需要,你可以对说明进行调整。
如果你做了任何更改,请点击 **Save changes**。
1. 在配置页面的右侧面板中,选择 **Test Chat** 标签页。
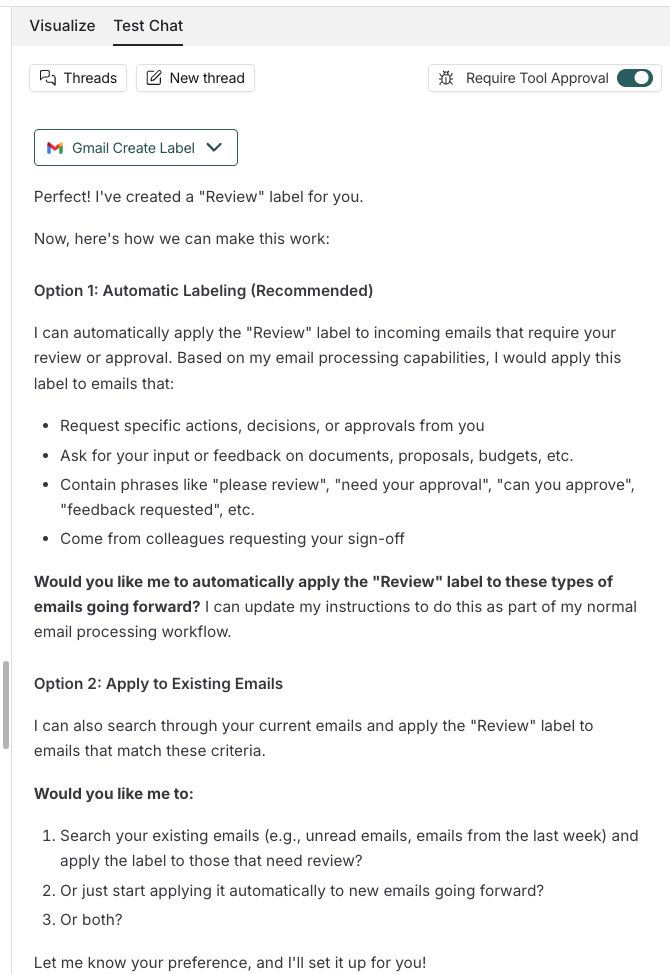
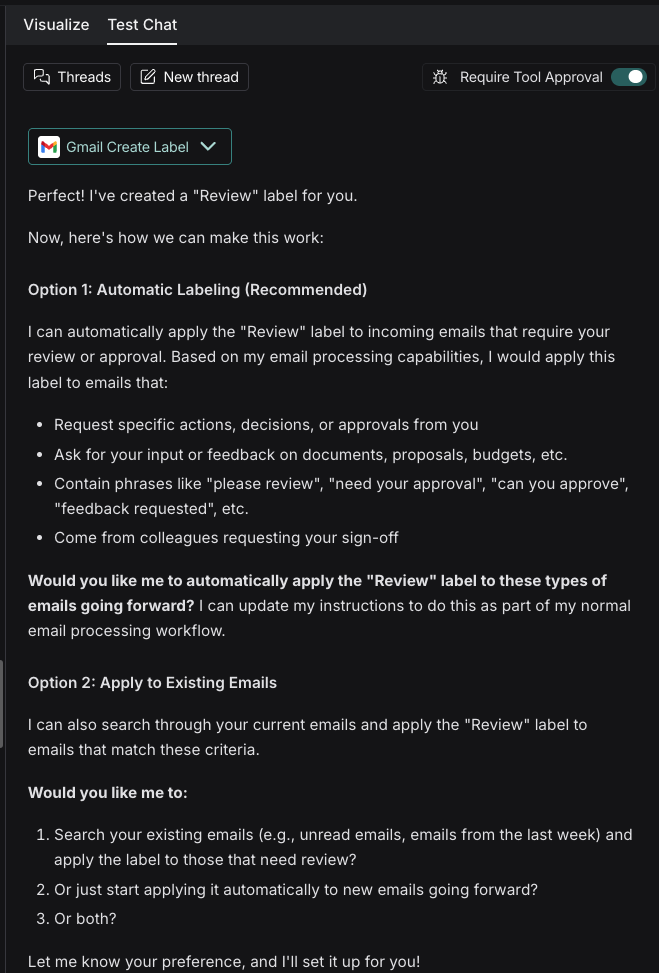
2. 在聊天界面中试用邮件助手,例如:
> *为我收到的需要我进行某种审查的邮件应用一个 "Review" 标签*
你的智能体将开始工作,并为每个需要你批准的步骤提供 **Continue** 选项。
 3. 当你测试智能体时,你可以编辑说明,或添加你可能需要的工具。当你对结果满意时,点击 **Save changes**。
## 编辑你的智能体
你可能想要更新你的智能体的说明或包含更多工具。你可以直接与你的智能体聊天以请求更新,或者你可以:
1. 从左侧导航栏的 **My Agents** 中,选择你想要编辑的智能体。
2. 选择 **Edit Agent**。
在智能体的编辑页面,你可以:
* 使用 **+ Add tool** 添加工具,以连接更多应用和服务,如 Slack、GitHub 或 Linear。
* 使用 **+ Add sub-agent** 添加更多助手,将复杂任务分解为专门的子任务。
* 请求对现有工具进行审查暂停。
* 修改现有工具。
* 探索可以自动启动你的智能体的渠道。
## 后续步骤
既然你已经创建了你的第一个智能体,以下是你可以探索的内容:
探索用于常见任务的预构建智能体
使用渠道(Slack、电子邮件、计划任务)自动运行你的智能体
添加 Slack、GitHub、Linear 等
使用子智能体分解大型任务
***
3. 当你测试智能体时,你可以编辑说明,或添加你可能需要的工具。当你对结果满意时,点击 **Save changes**。
## 编辑你的智能体
你可能想要更新你的智能体的说明或包含更多工具。你可以直接与你的智能体聊天以请求更新,或者你可以:
1. 从左侧导航栏的 **My Agents** 中,选择你想要编辑的智能体。
2. 选择 **Edit Agent**。
在智能体的编辑页面,你可以:
* 使用 **+ Add tool** 添加工具,以连接更多应用和服务,如 Slack、GitHub 或 Linear。
* 使用 **+ Add sub-agent** 添加更多助手,将复杂任务分解为专门的子任务。
* 请求对现有工具进行审查暂停。
* 修改现有工具。
* 探索可以自动启动你的智能体的渠道。
## 后续步骤
既然你已经创建了你的第一个智能体,以下是你可以探索的内容:
探索用于常见任务的预构建智能体
使用渠道(Slack、电子邮件、计划任务)自动运行你的智能体
添加 Slack、GitHub、Linear 等
使用子智能体分解大型任务
***
[将这些文档](/use-these-docs)通过 MCP 连接到 Claude、VSCode 等,以获取实时答案。
[在 GitHub 上编辑此页面](https://github.com/langchain-ai/docs/edit/main/src/langsmith/fleet/quickstart.mdx) 或 [提交问题](https://github.com/langchain-ai/docs/issues/new/choose)。