> ## Documentation Index
> Fetch the complete documentation index at: https://cndoc-langchain.site/llms.txt
> Use this file to discover all available pages before exploring further.

# 自定义输出渲染

自定义输出渲染允许您使用自己的自定义 HTML 页面来可视化运行输出和数据集参考输出。这对于以下情况特别有用：

* **特定领域格式化**：以原生格式显示医疗记录、法律文档或其他专业数据类型。
* **自定义可视化**：从数值或结构化输出数据创建图表、图形或示意图。

在本页中，您将学习如何：

* **[配置自定义渲染](#configure-custom-output-rendering)** 在 LangSmith UI 中。
* **[构建自定义渲染器](#build-a-custom-renderer)** 以显示输出数据。
* **[了解自定义渲染出现的位置](#where-custom-rendering-appears)** 在 LangSmith 中。

## 配置自定义输出渲染

在两个级别配置自定义渲染：

* **对于数据集**：将自定义渲染应用于与该数据集关联的所有运行，无论它们出现在何处——在实验中、运行详情窗格中或标注队列中。
* **对于标注队列**：将自定义渲染应用于特定标注队列中的所有运行，无论它们来自哪个数据集。这优先于数据集级别的配置。

### 对于追踪项目

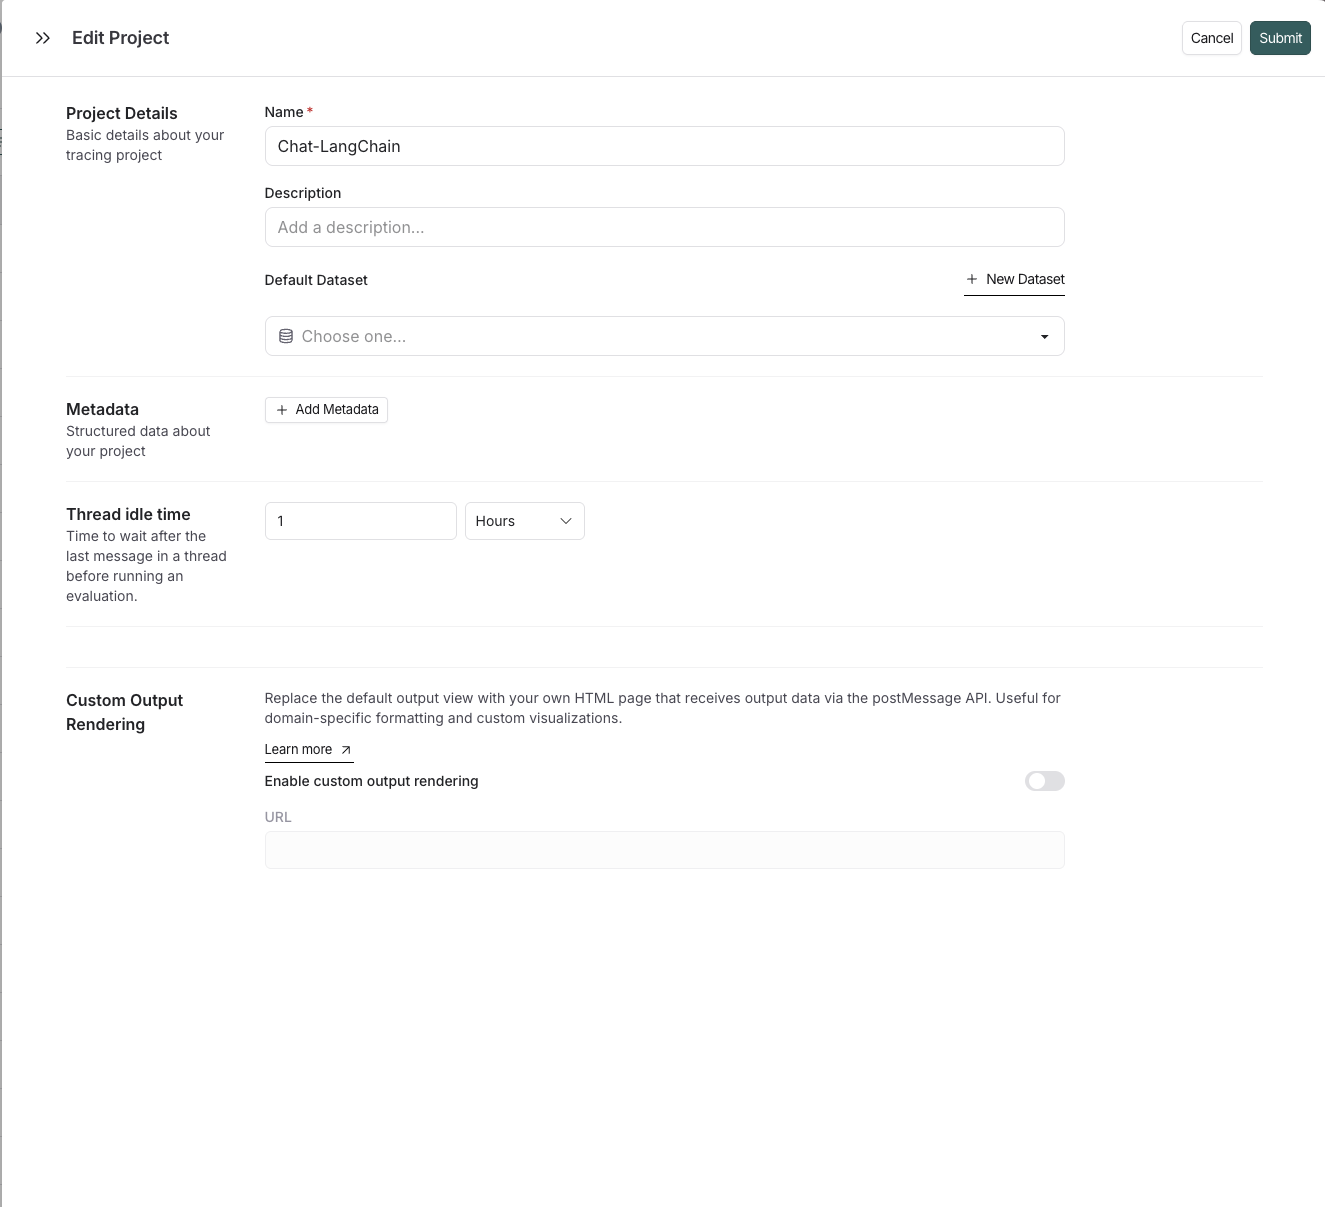
要为追踪项目配置自定义输出渲染：

<img src="https://mintcdn.com/other-405835d4/77NFW0Y3VGYDwREY/langsmith/images/tracing-project-custom-output-rendering-settings.png?fit=max&auto=format&n=77NFW0Y3VGYDwREY&q=85&s=379f2f49ada858325f62c57ee0429a51" alt="显示自定义输出渲染配置的追踪项目设置" width="1325" height="1207" data-path="langsmith/images/tracing-project-custom-output-rendering-settings.png" />

1. 导航到 **追踪项目** 页面。
2. 单击现有追踪项目或创建一个新项目。
3. 在编辑追踪项目窗格中，滚动到 **自定义输出渲染** 部分。
4. 切换 **启用自定义输出渲染**。
5. 在 **URL** 字段中输入网页 URL。
6. 单击 **保存**。
### 对于数据集

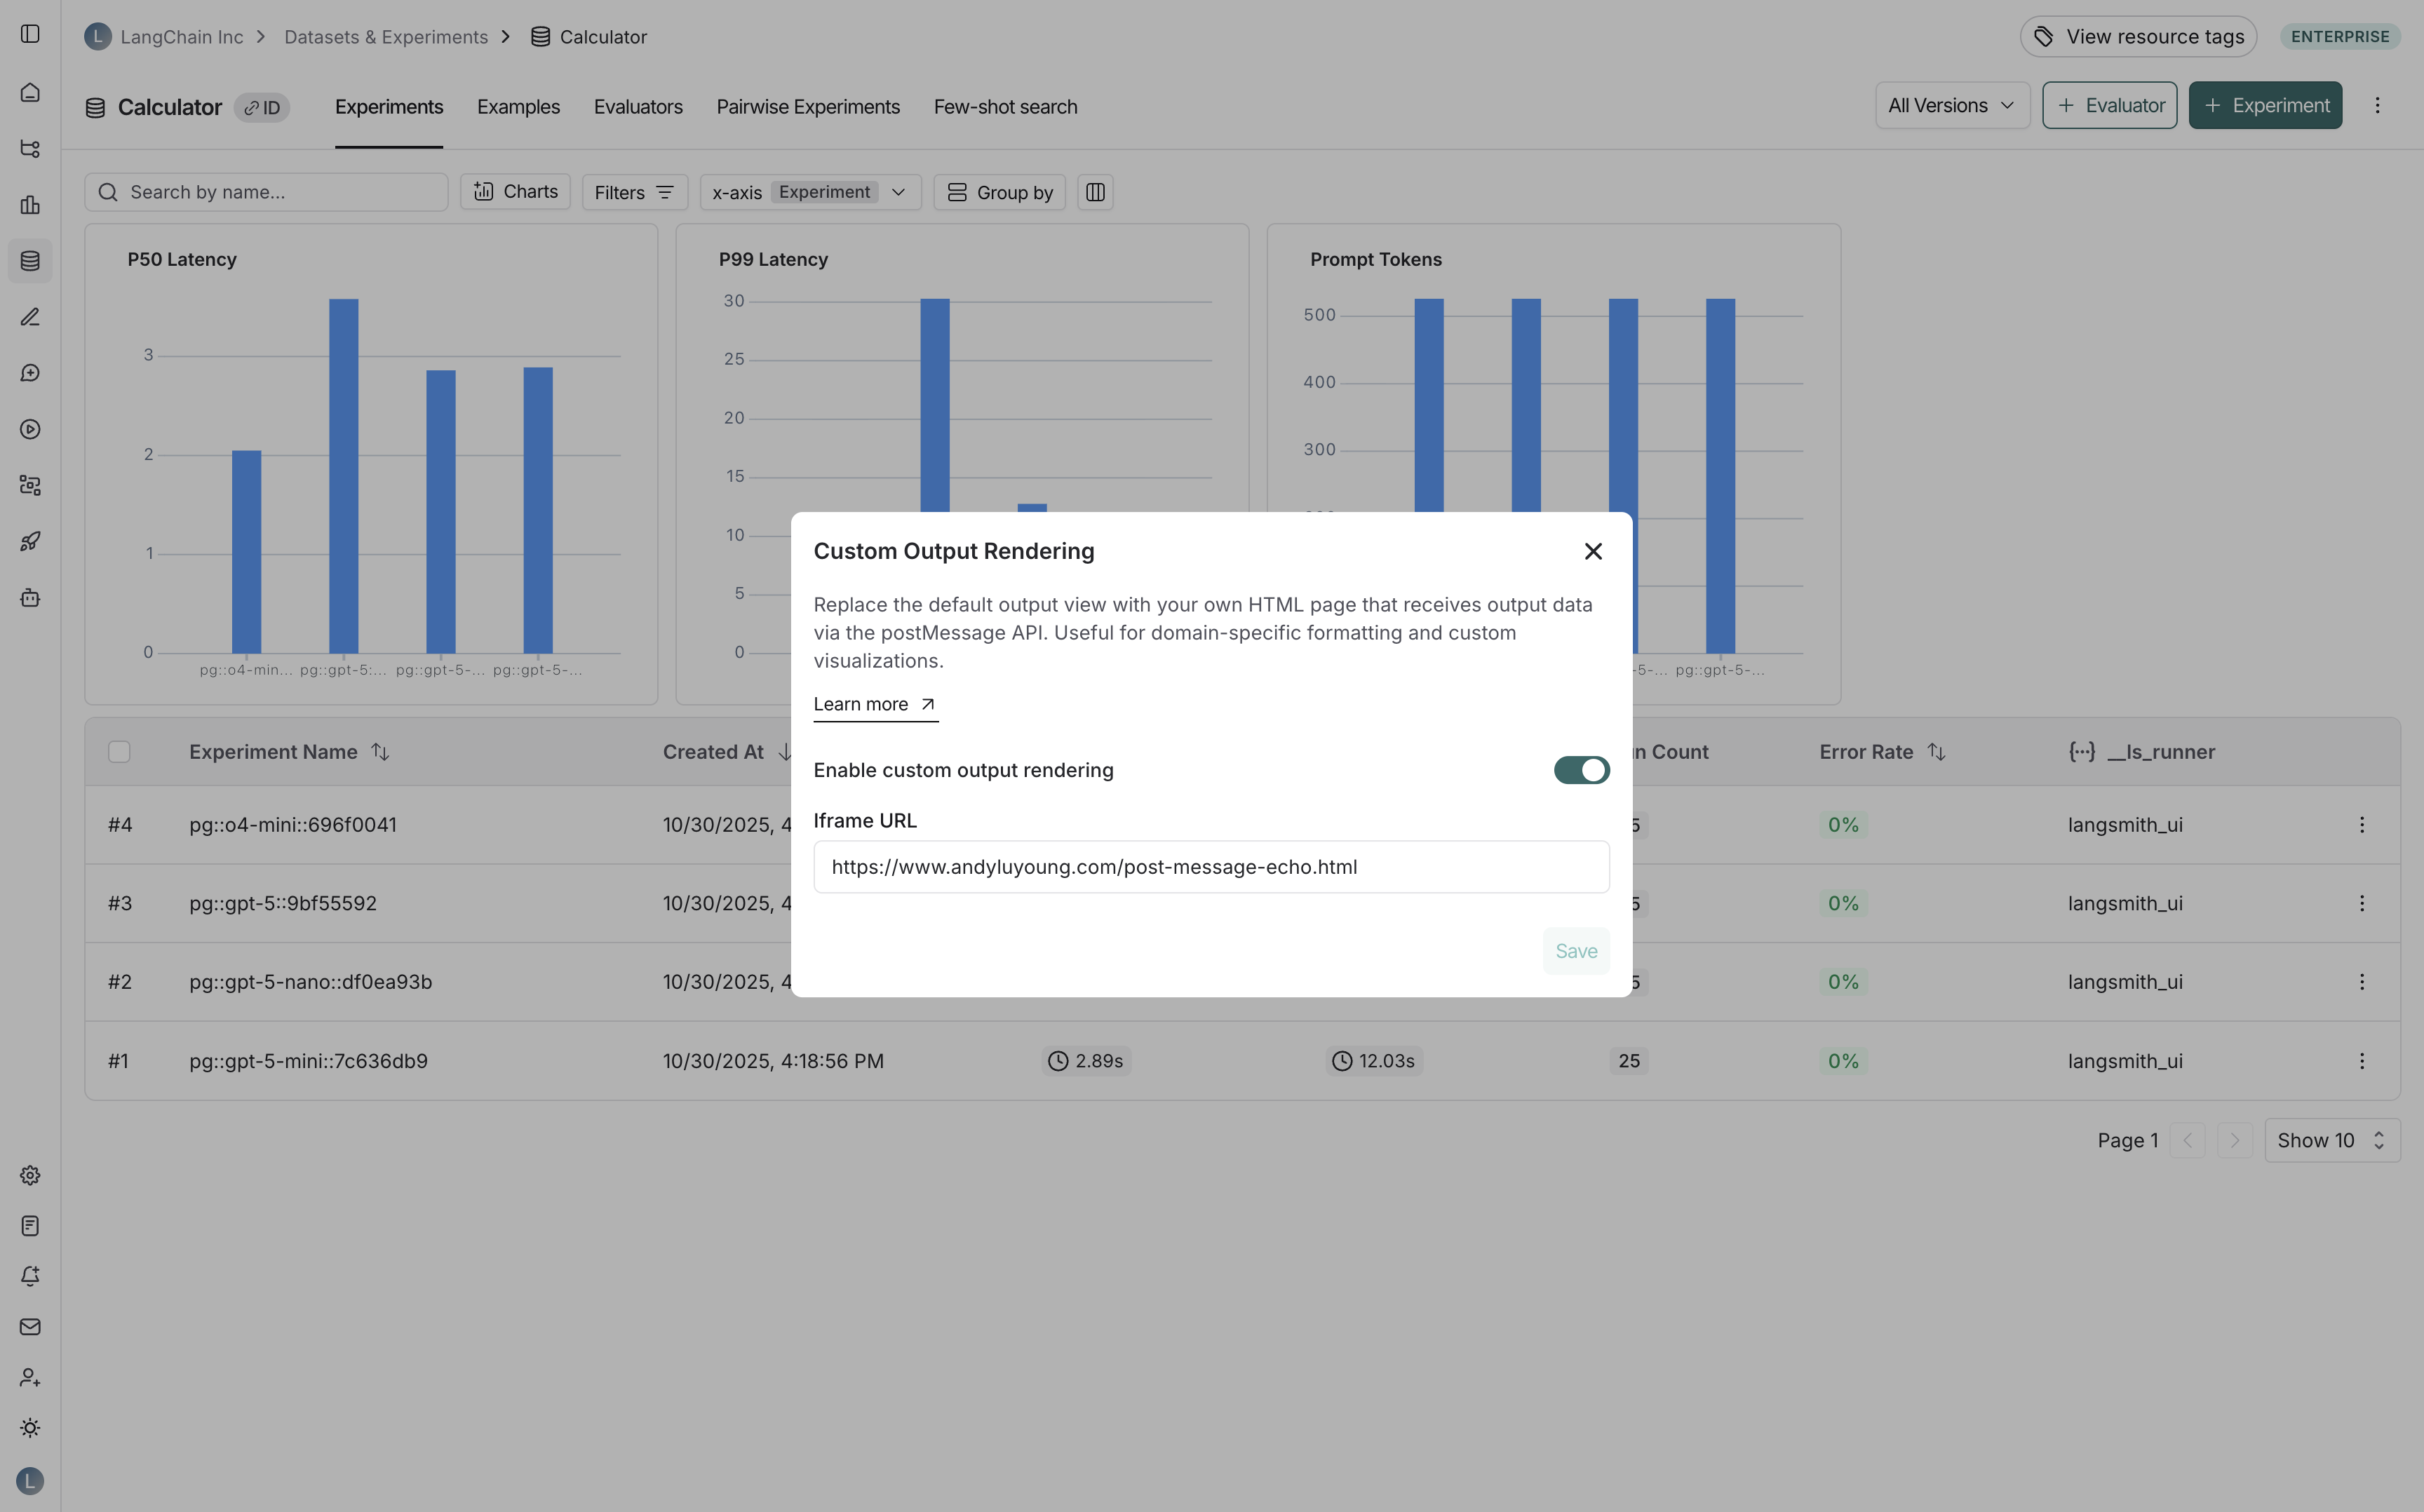
要为数据集配置自定义输出渲染：

<img src="https://mintcdn.com/other-405835d4/jwwDDYly65_K9YMB/langsmith/images/custom-output-rendering-menu.png?fit=max&auto=format&n=jwwDDYly65_K9YMB&q=85&s=c98ac0daecc7362d44a6e7e005d3e3cc" alt="数据集页面，三点菜单显示自定义输出渲染选项" width="3456" height="2156" data-path="langsmith/images/custom-output-rendering-menu.png" />

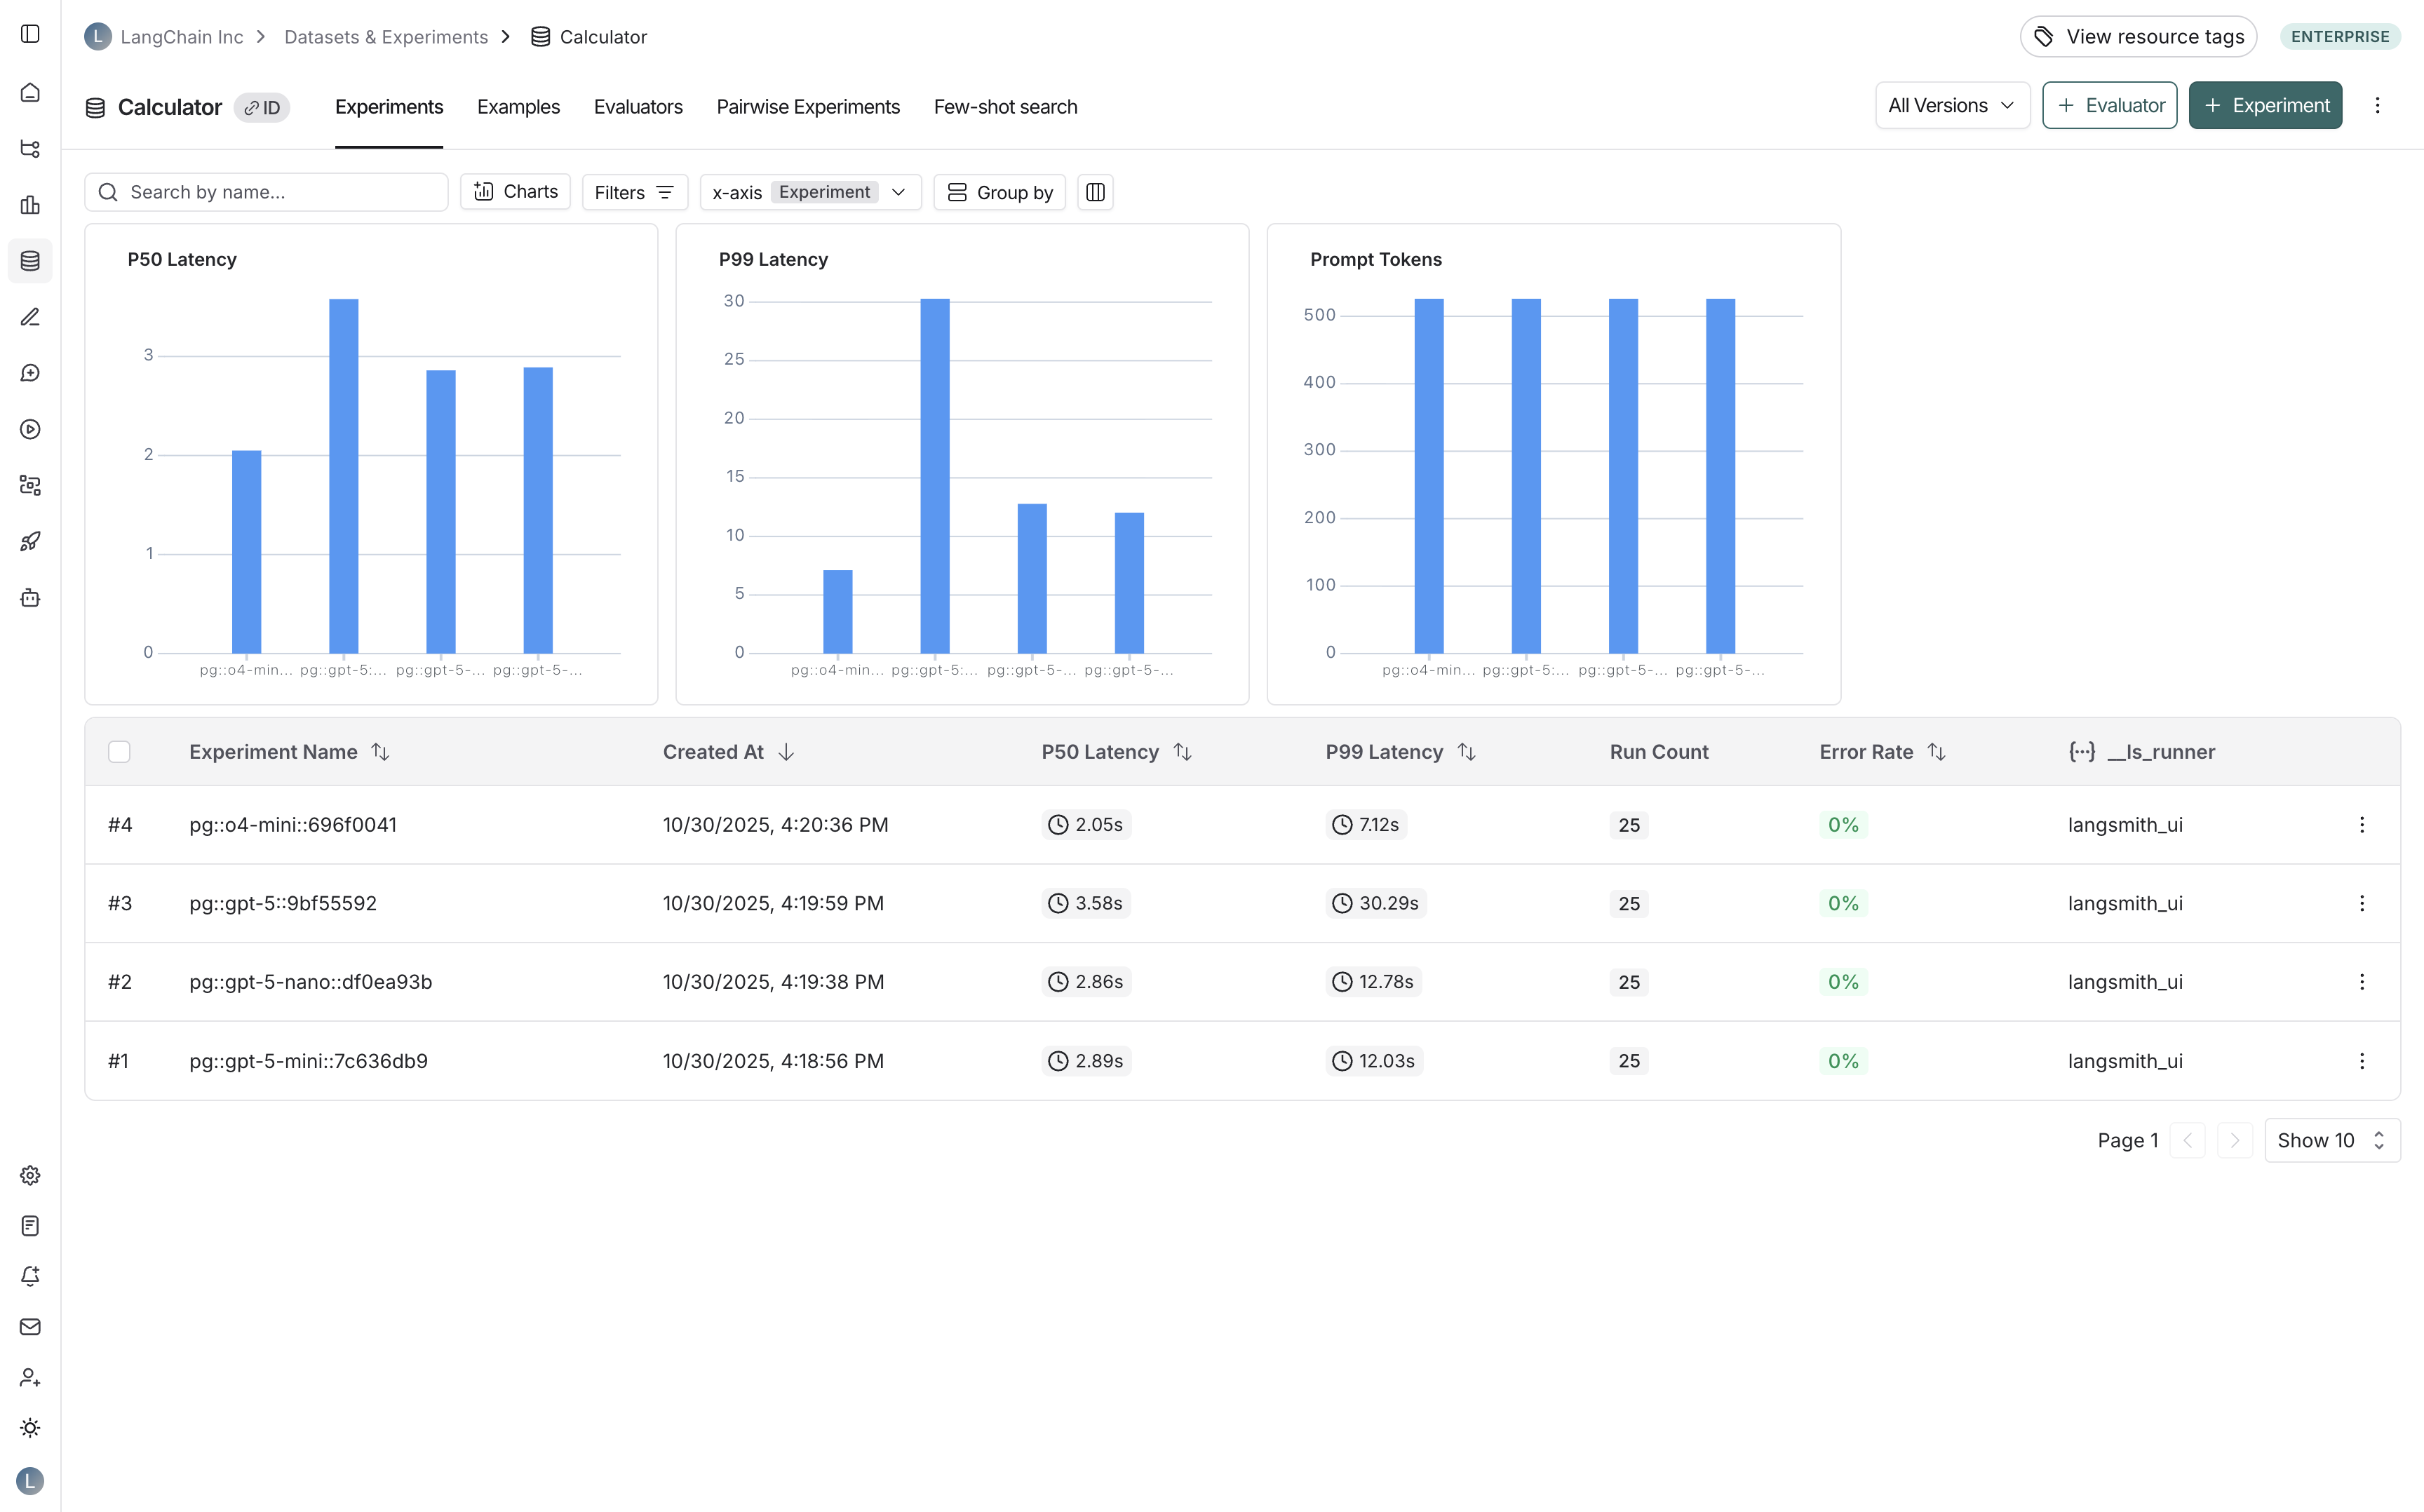
1. 在 **数据集与实验** 页面中导航到您的数据集。
2. 单击右上角的 **⋮**（三点菜单）。
3. 选择 **自定义输出渲染**。
4. 切换 **启用自定义输出渲染**。
5. 在 **URL** 字段中输入网页 URL。
6. 单击 **保存**。

<img src="https://mintcdn.com/other-405835d4/jwwDDYly65_K9YMB/langsmith/images/custom-output-rendering-modal.png?fit=max&auto=format&n=jwwDDYly65_K9YMB&q=85&s=9a97da3f9898968ed3b0c696f8b3ddef" alt="已填写字段的自定义输出渲染模态框" width="3456" height="2156" data-path="langsmith/images/custom-output-rendering-modal.png" />

### 对于标注队列

要为标注队列配置自定义输出渲染：

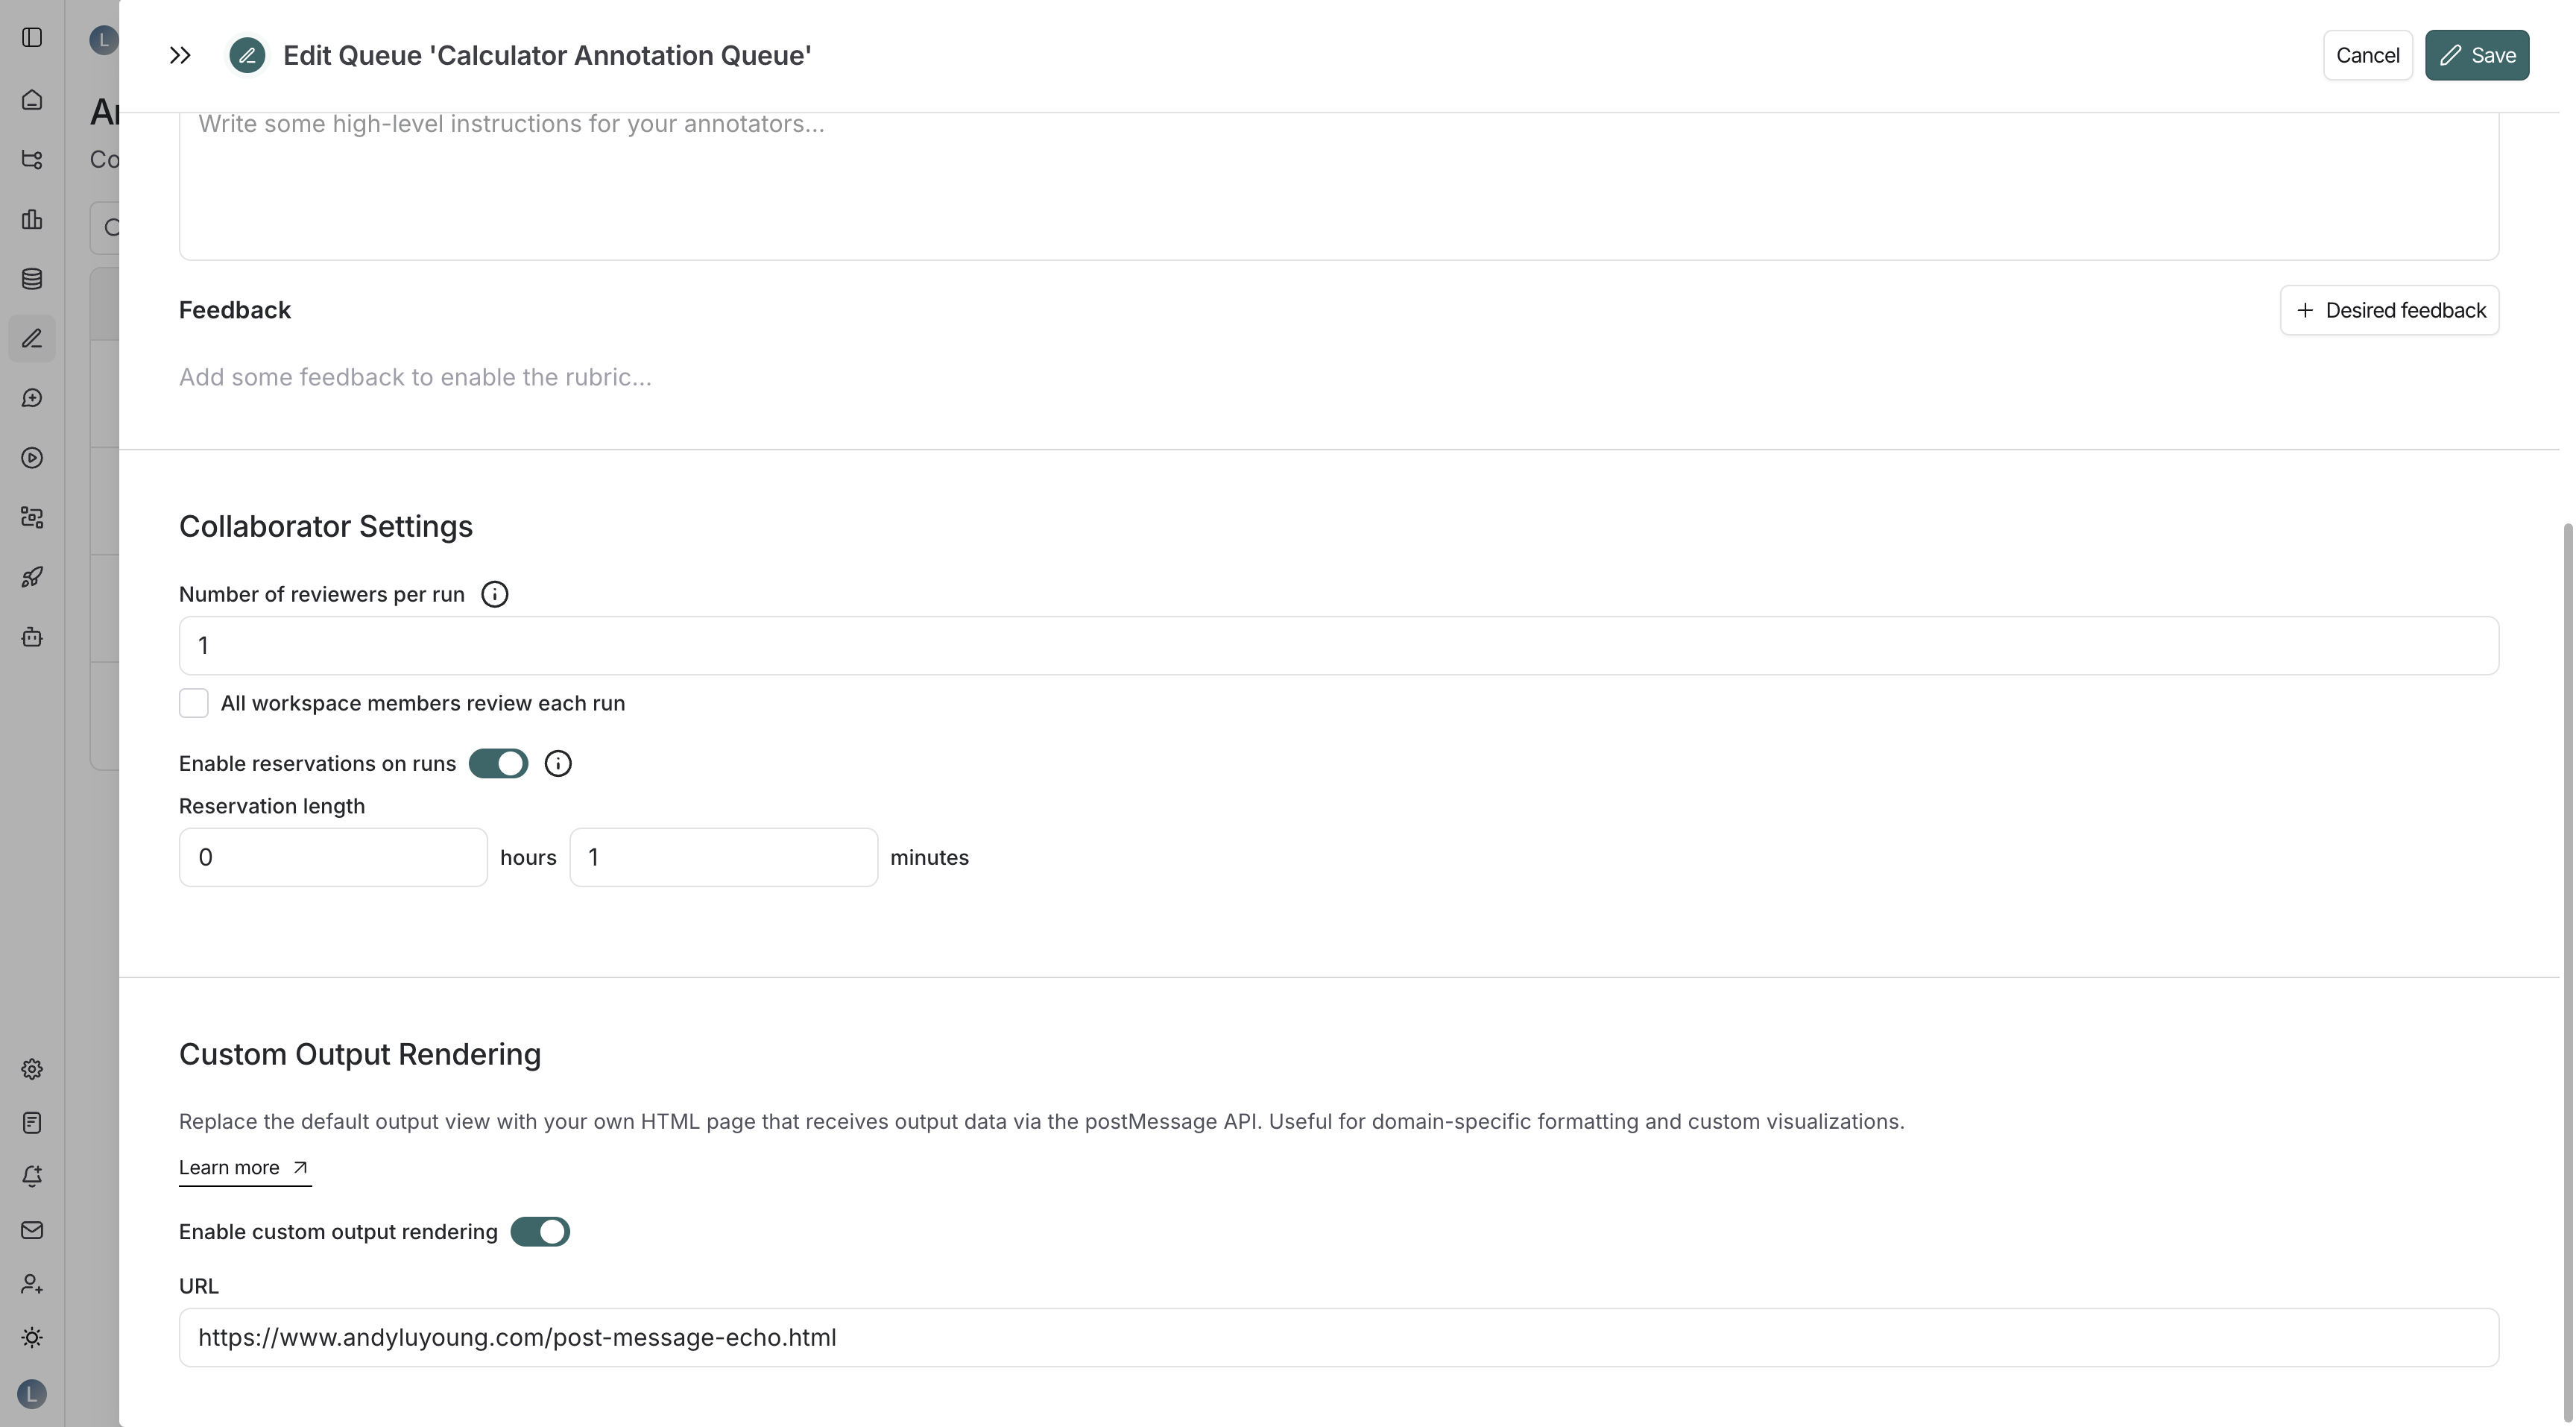
<img src="https://mintcdn.com/other-405835d4/U_V3brHb6y_62TSF/langsmith/images/annotation-queue-custom-output-rendering-settings.png?fit=max&auto=format&n=U_V3brHb6y_62TSF&q=85&s=04962d0f989557889e1d22288e98f1cc" alt="显示自定义输出渲染配置的标注队列设置" width="3456" height="1914" data-path="langsmith/images/annotation-queue-custom-output-rendering-settings.png" />

1. 导航到 **标注队列** 页面。
2. 单击现有标注队列或创建一个新队列。
3. 在标注队列设置窗格中，滚动到 **自定义输出渲染** 部分。
4. 切换 **启用自定义输出渲染**。
5. 在 **URL** 字段中输入网页 URL。
6. 单击 **保存** 或 **创建**。
<Info>当自定义渲染设置在多个级别应用时，优先级如下：标注队列 > 数据集 > 追踪项目。</Info>

## 构建自定义渲染器

### 理解消息格式

您的 HTML 页面将通过 [postMessage API](https://developer.mozilla.org/en-US/docs/Web/API/Window/postMessage) 接收输出数据。LangSmith 发送具有以下结构的消息：

```typescript theme={"theme":{"light":"catppuccin-latte","dark":"catppuccin-mocha"}}
{
  type: "output" | "reference",
  data: {
    // 输出（实际输出或参考输出）
    // 结构根据您的应用程序而变化
  },
  metadata: {
    inputs: {
      // 生成此输出的输入
      // 结构根据您的应用程序而变化
    }
  }
}
```

* `type`：指示这是实际输出（`"output"`）还是参考输出（`"reference"`）。
* `data`：输出数据本身。
* `metadata.inputs`：生成此输出的输入数据，作为上下文提供。

<Note>**消息传递时机**：LangSmith 使用指数退避重试机制，以确保即使您的页面加载缓慢也能接收到数据。消息最多发送 6 次，延迟时间递增（100ms、200ms、400ms、800ms、1600ms、3200ms）。</Note>

### 示例实现

此示例监听传入的 postMessage 事件并在页面上显示它们。每条消息都编号并格式化为 JSON，便于检查 LangSmith 发送到您的渲染器的数据结构。

```html theme={"theme":{"light":"catppuccin-latte","dark":"catppuccin-mocha"}}
<!DOCTYPE html>
<html>
    <head>
        <meta charset="UTF-8" />
        <title>PostMessage 回显</title>
        <link rel="stylesheet" href="https://unpkg.com/sakura.css/css/sakura.css" />
    </head>
    <body>
        <h1>PostMessage 消息</h1>
        <div id="messages"></div>
        <script>
            let count = 0;
            window.addEventListener("message", (event) => {
                count++;
                const header = document.createElement("h3");
                header.appendChild(document.createTextNode(`消息 ${count}`));
                const code = document.createElement("code");
                code.appendChild(document.createTextNode(JSON.stringify(event.data, null, 2)));
                const pre = document.createElement("pre");
                pre.appendChild(code);
                document.getElementById("messages").appendChild(header);
                document.getElementById("messages").appendChild(pre);
            });
        </script>
    </body>
</html>
```

## 自定义渲染出现的位置

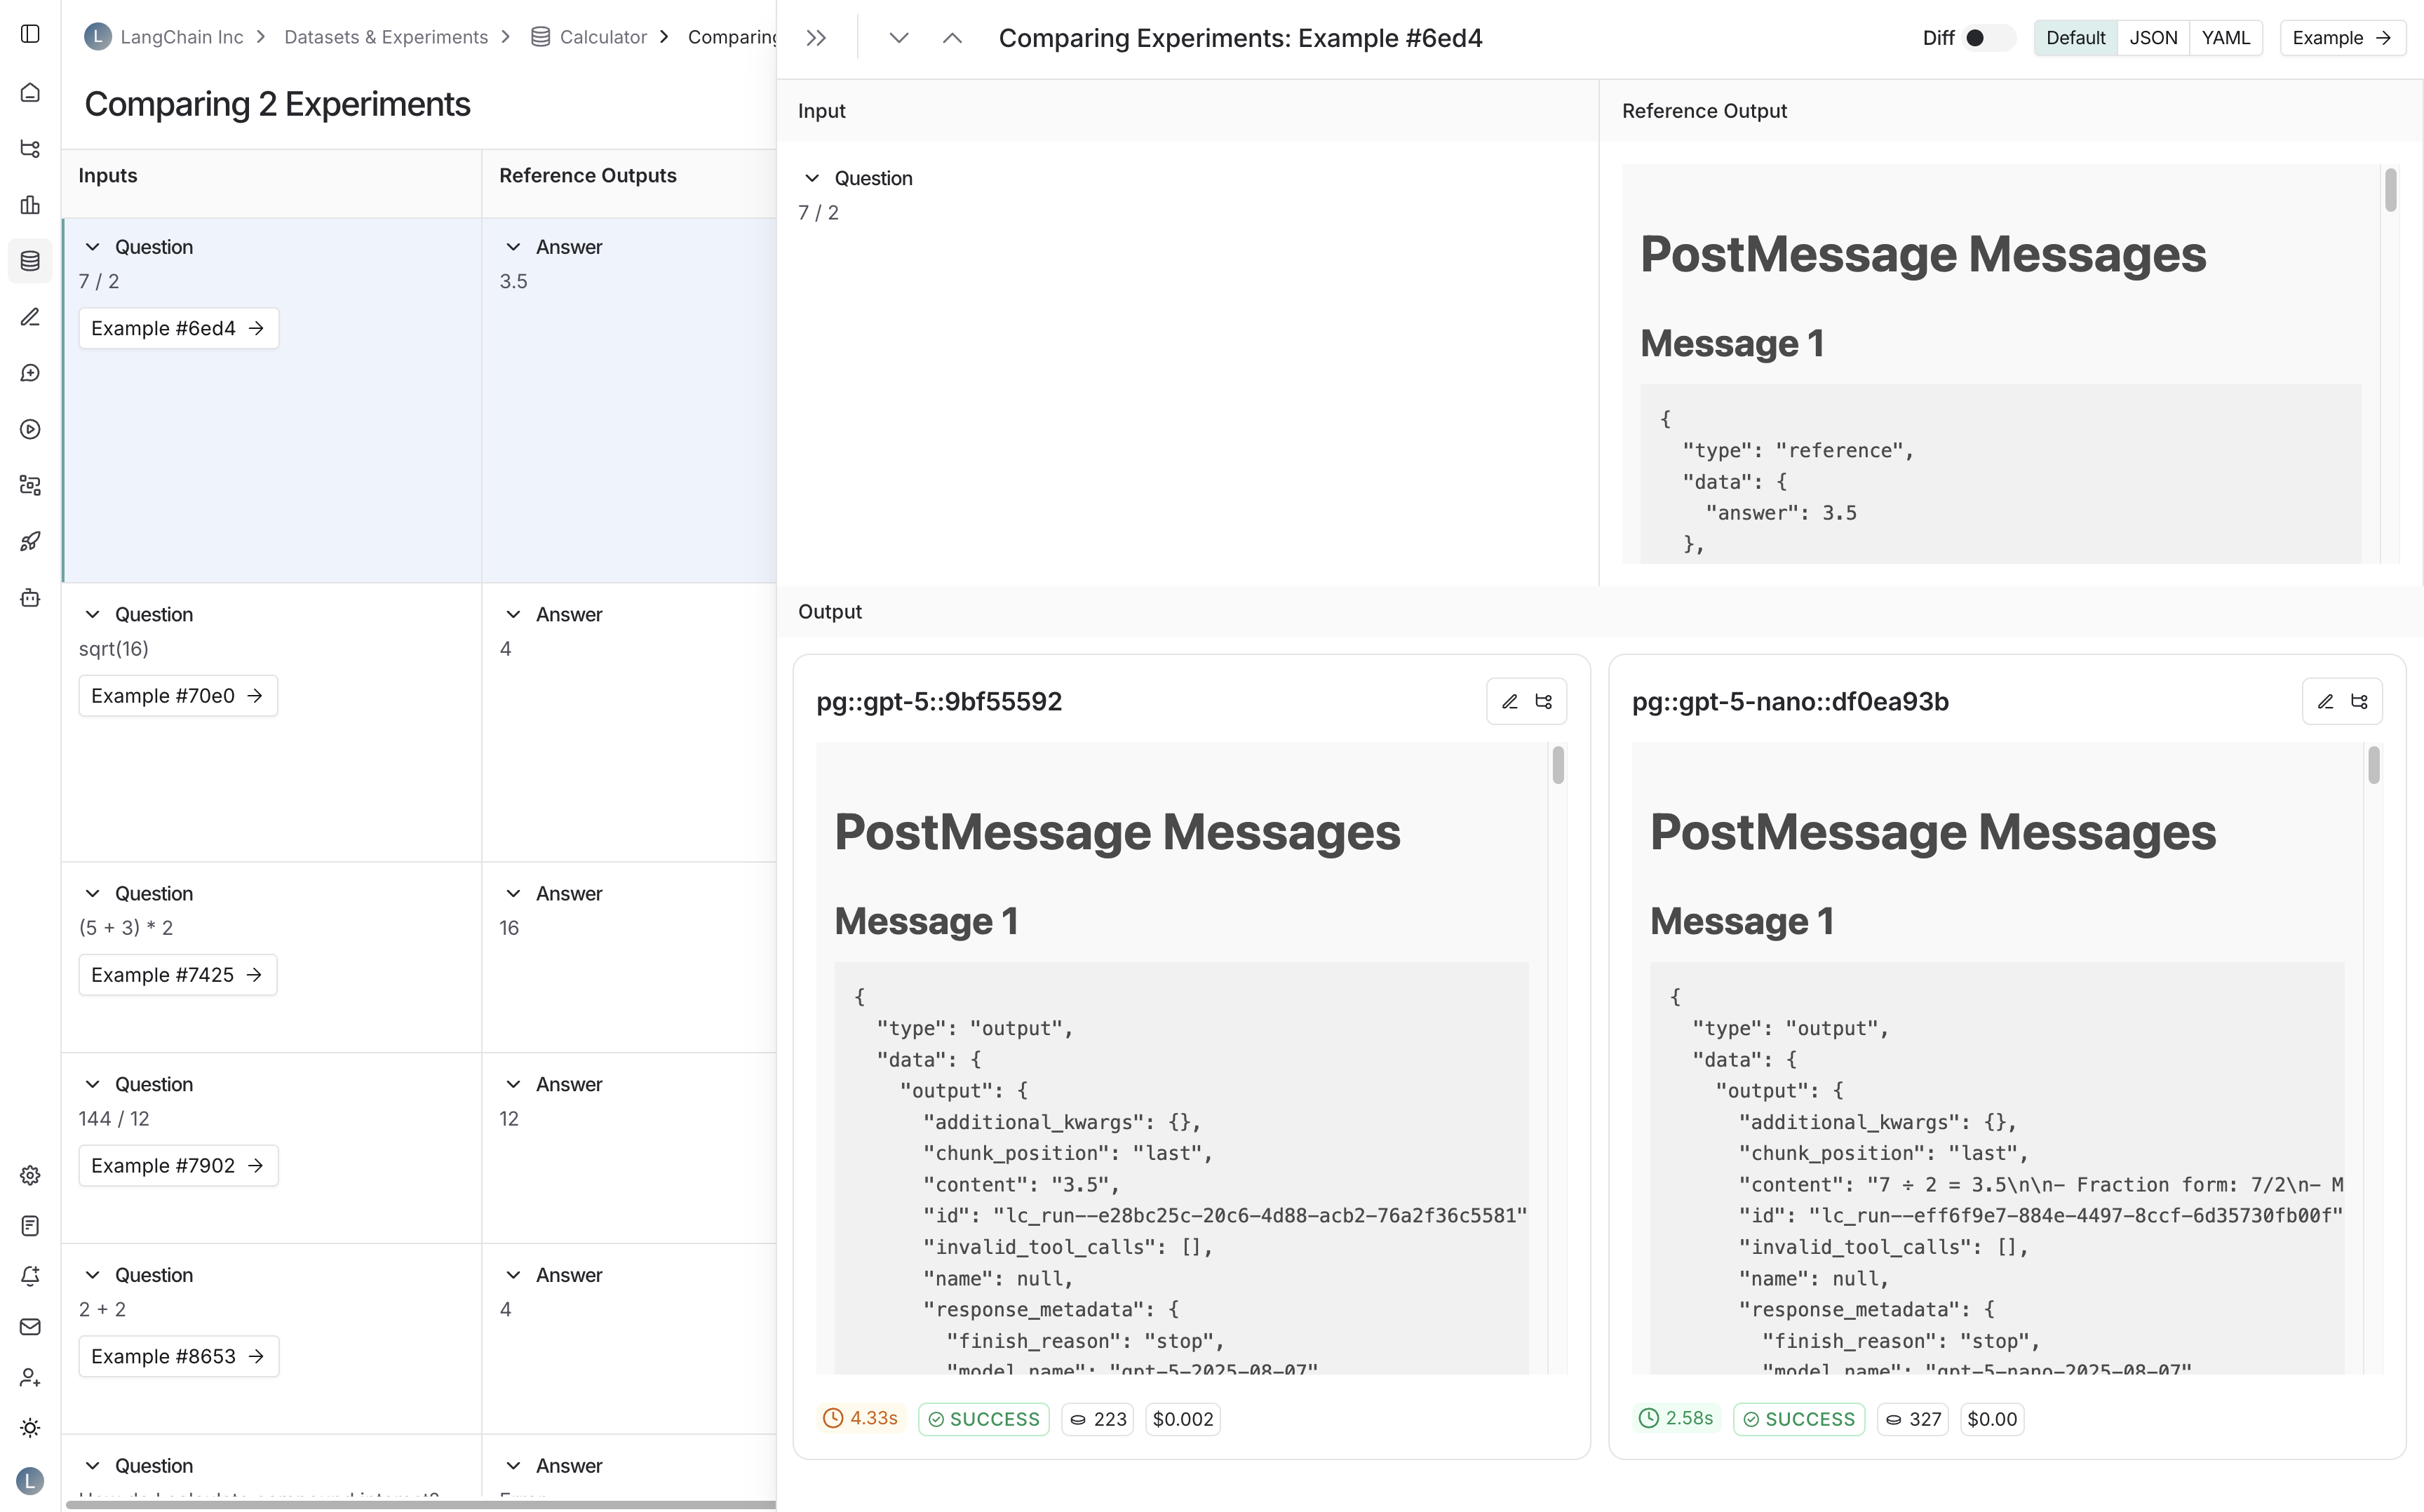
启用后，您的自定义渲染将替换以下位置的默认输出视图：

* **实验比较视图**：当比较多个实验的输出时：

<img src="https://mintcdn.com/other-405835d4/jwwDDYly65_K9YMB/langsmith/images/custom-output-rendering-experiment-comparison.png?fit=max&auto=format&n=jwwDDYly65_K9YMB&q=85&s=29aa649161267c7780afd8fe47a33ea1" alt="显示自定义渲染的实验比较视图" width="3456" height="2156" data-path="langsmith/images/custom-output-rendering-experiment-comparison.png" />

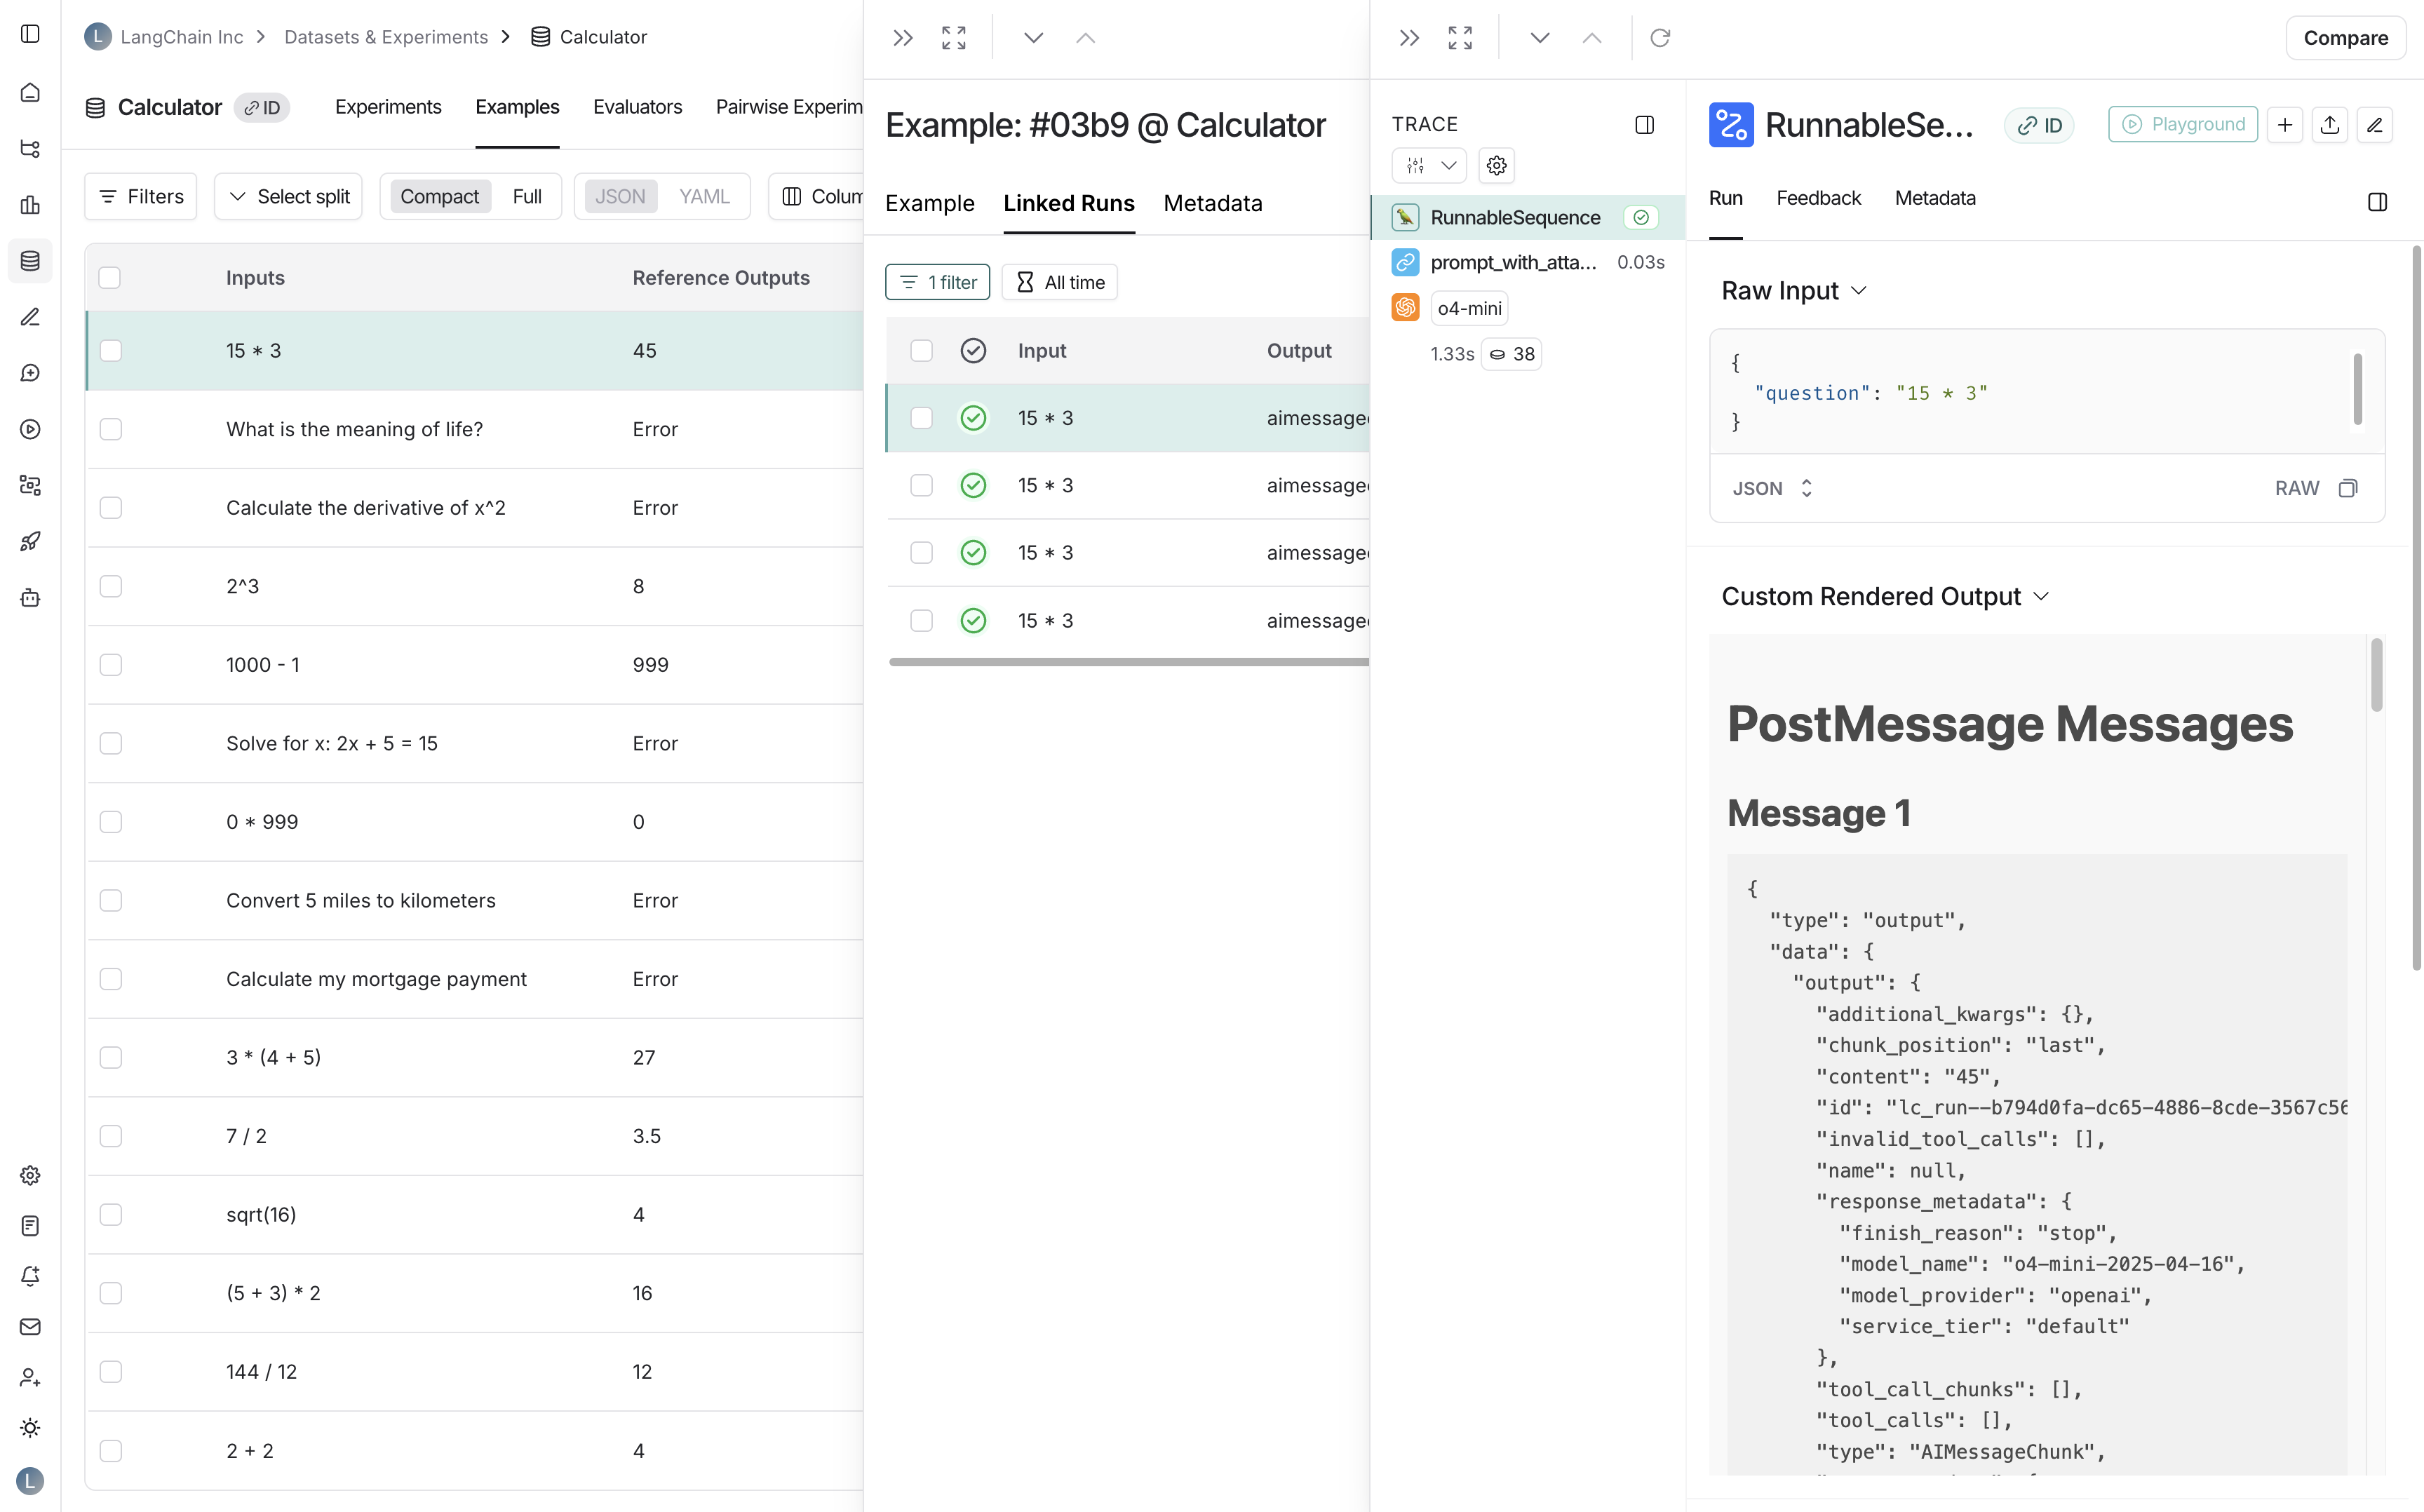
* **运行详情窗格**：当查看与数据集关联的运行时：

<img src="https://mintcdn.com/other-405835d4/jwwDDYly65_K9YMB/langsmith/images/custom-output-rendering-run-details.png?fit=max&auto=format&n=jwwDDYly65_K9YMB&q=85&s=105a89e7d9f78bcf5ac4c3cdc15e6a14" alt="显示自定义渲染的运行详情窗格" width="3456" height="2156" data-path="langsmith/images/custom-output-rendering-run-details.png" />

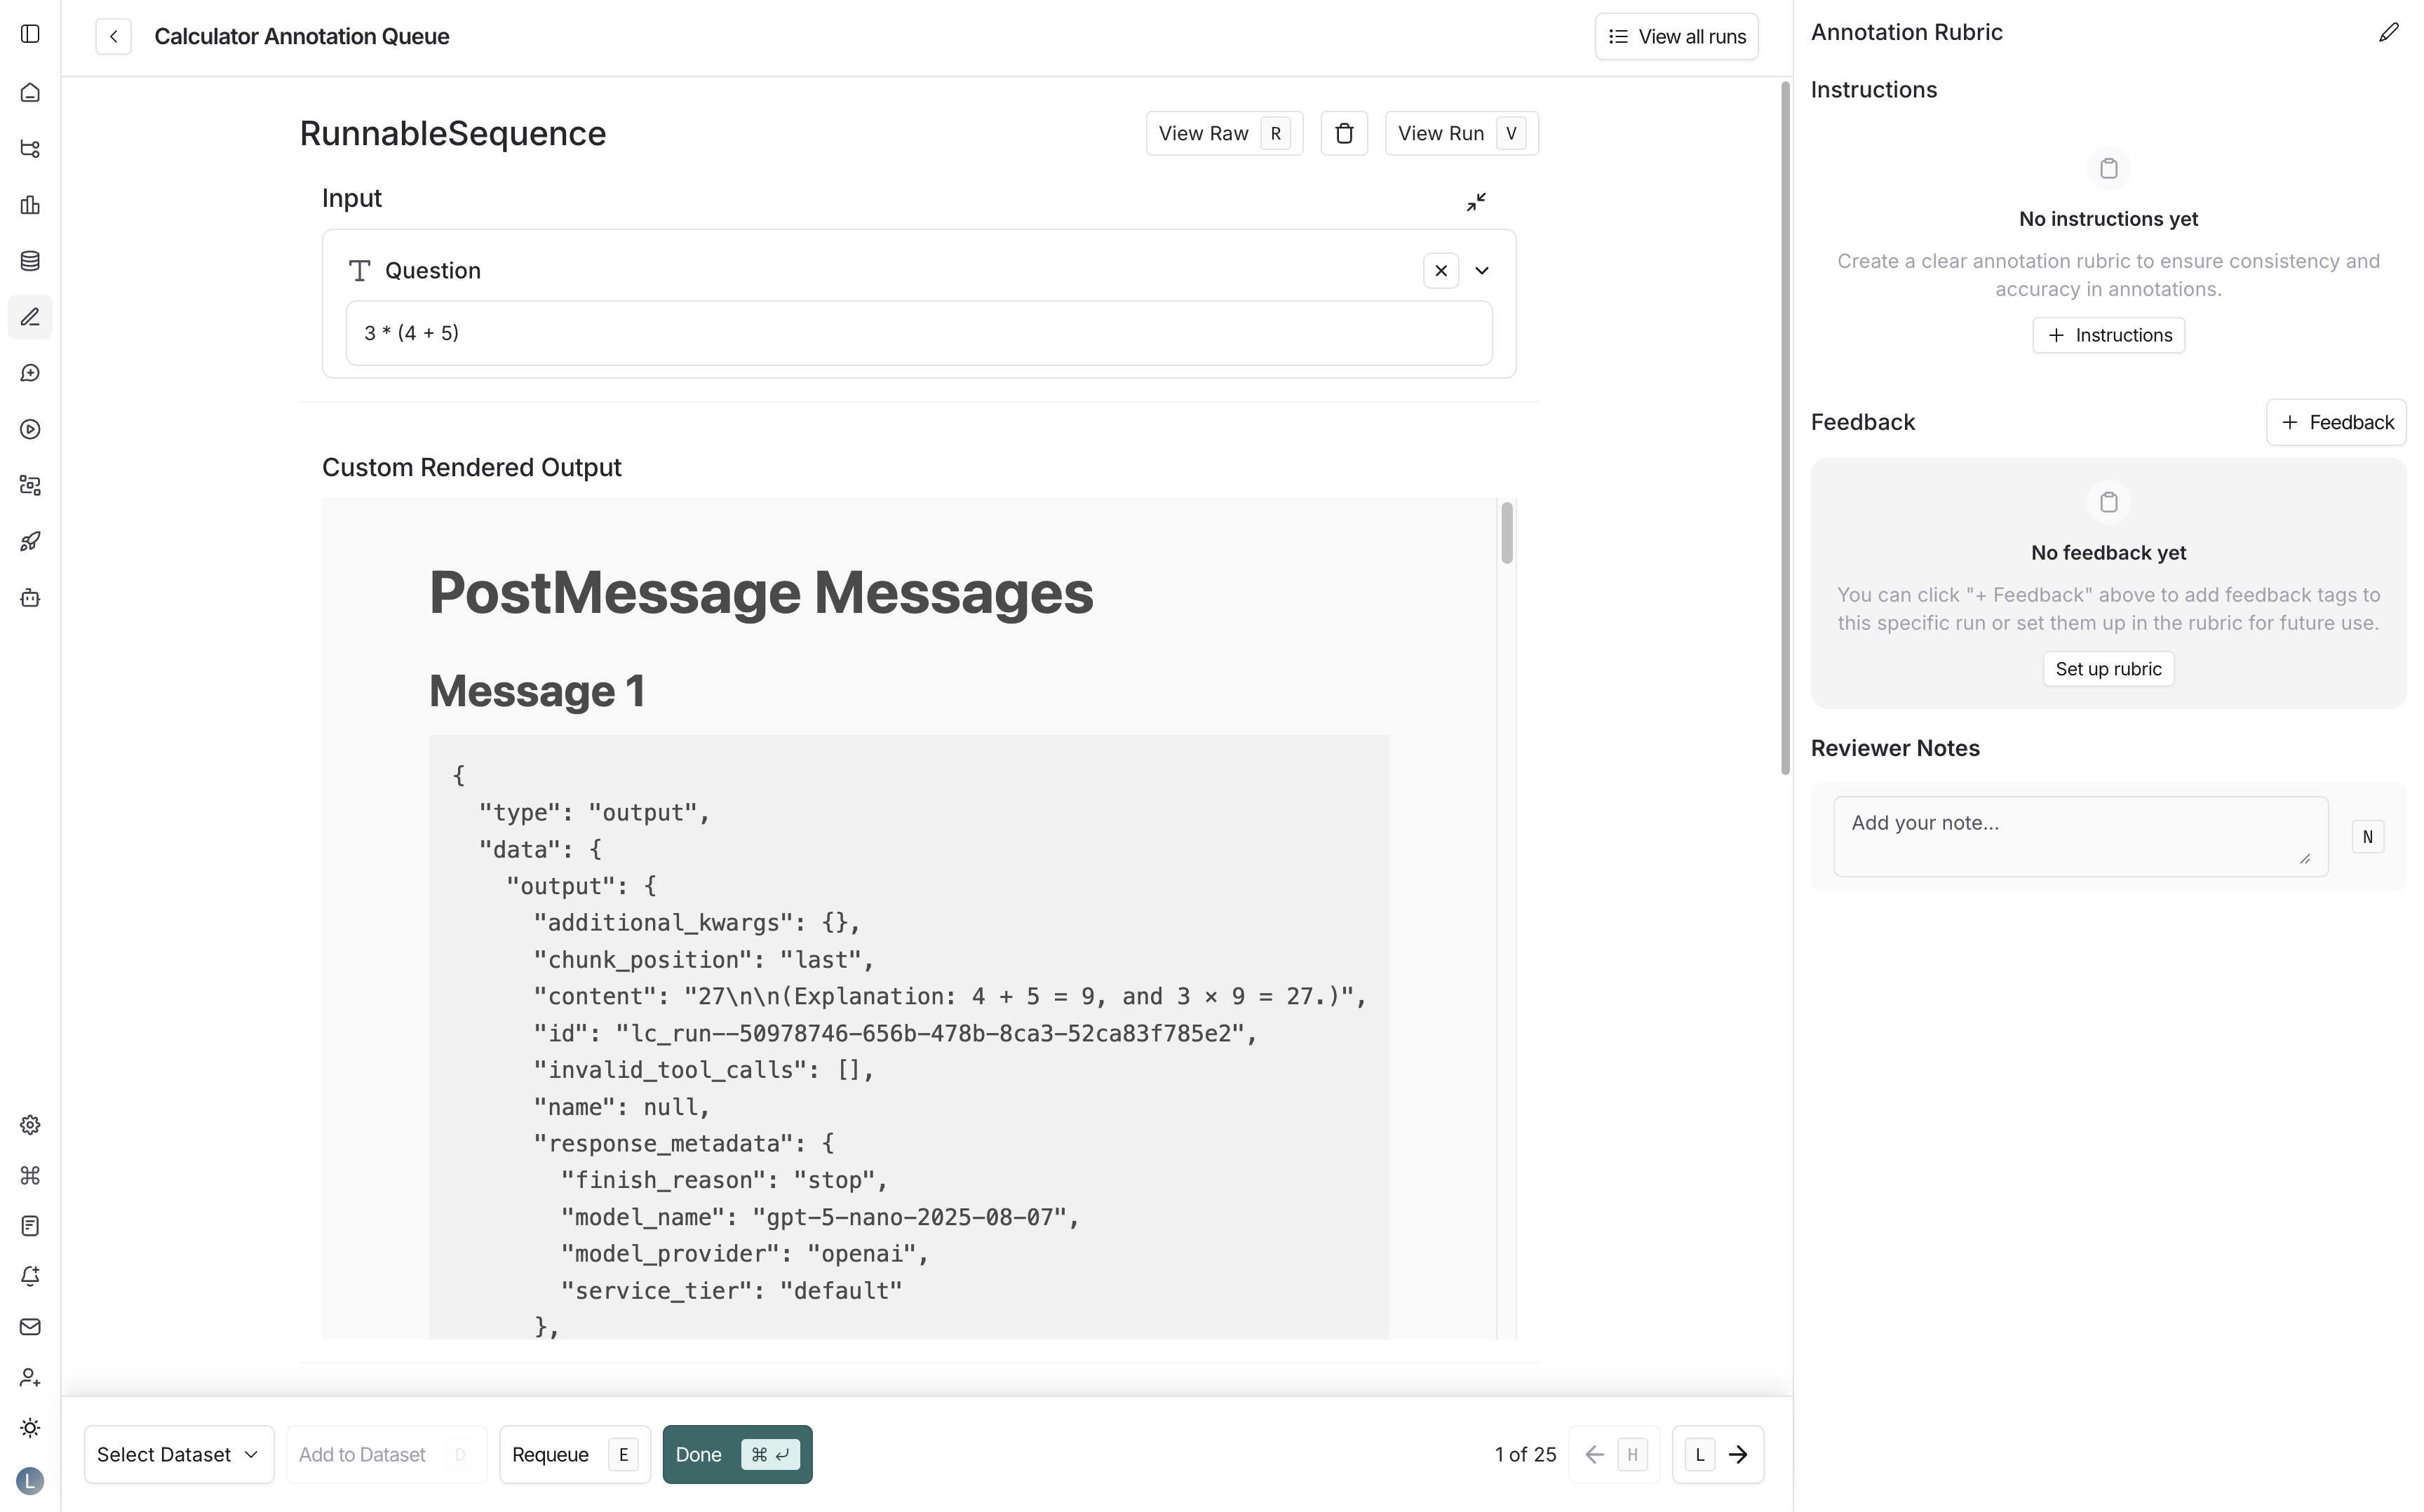
* **标注队列**：当在标注队列中查看运行时：

<img src="https://mintcdn.com/other-405835d4/jwwDDYly65_K9YMB/langsmith/images/custom-output-rendering-annotation-queue.png?fit=max&auto=format&n=jwwDDYly65_K9YMB&q=85&s=e63b321c1fcba9aaaa5e929be5a0fbaf" alt="显示自定义渲染的标注队列" width="3456" height="2156" data-path="langsmith/images/custom-output-rendering-annotation-queue.png" />

***

<div className="source-links">
  <Callout icon="terminal-2">
    [将这些文档连接](/use-these-docs)到 Claude、VSCode 等，通过 MCP 获取实时答案。
  </Callout>

  <Callout icon="edit">
    [在 GitHub 上编辑此页面](https://github.com/langchain-ai/docs/edit/main/src/langsmith/custom-output-rendering.mdx) 或 [提交问题](https://github.com/langchain-ai/docs/issues/new/choose)。
  </Callout>
</div>